Windows authentication enables users to log in with their Windows credentials, using Kerberos or NTLM. The client sends credentials in the Authorization header. Windows authentication is best suited for an intranet environment. you can use Windows authentication when your IIS 7 or later server runs on a corporate network that is using Microsoft Active Directory service domain identities or other Windows accounts to identify users. Because of this, you can use Windows authentication whether or not your server is a member of an Active Directory domain.
Windows authentication (formerly named NTLM, and also referred to as Windows NT Challenge/Response authentication) is a secure form of authentication because the user name and password are hashed before being sent across the network. When you enable Windows authentication, the client browser sends a strongly hashed version of the password in a cryptographic exchange with your Web server.
Windows authentication supports two authentication protocols, Kerberos and NTLM, which are defined in the
To use Windows authentication, you must adjust settings in both Microsoft Internet Information Services (IIS) and the ASP.NET application Web.config file.
Enable Windows Authentication In Web API
Let's first discuss, what do we want to achieve. Suppose, there is an organization, currently, has 200 employees, the organization wants anyone who can create an HTTP Service for them with the following functionalities:
• The Service should expose employees' data and allow creating new employees on the server.
• It must be secured with windows authentication.
• Anyone inside the same network should be able to make get requests but only those who are in the role of Manager, Editor, or Admin should be able to create employees.
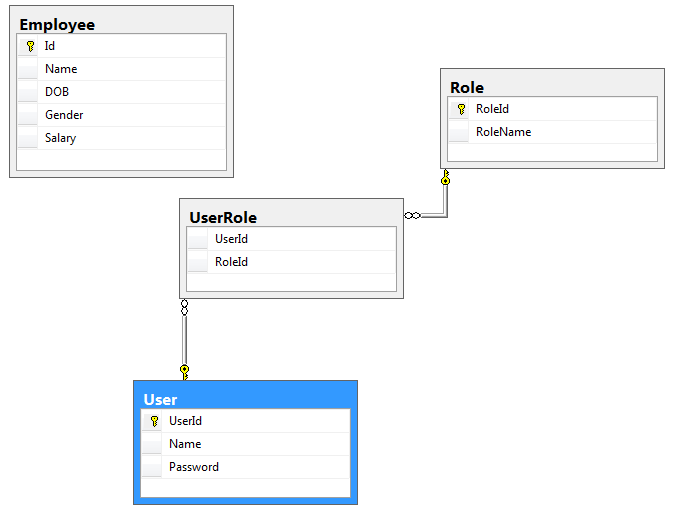
Step 1.Create a database and name it EmployeeService and run the below script to generate the required tables.
 SET ANSI_NULLS ON
 GO
 SET QUOTED_IDENTIFIER ON
 GO
 SET ANSI_PADDING ON
 GO
 CREATE TABLE [dbo].[Employee](
	[Id] [int] IDENTITY(1,1) NOT NULL,
	[Name] [varchar](50) NULL,
	[DOB] [date] NULL,
	[Gender] [varchar](50) NULL,
	[Salary] [int] NULL,
  CONSTRAINT [PK_Employee] PRIMARY KEY CLUSTERED
  (
	[Id] ASC
  )WITH (PAD_INDEX = OFF, STATISTICS_NORECOMPUTE = OFF, IGNORE_DUP_KEY = OFF, ALLOW_ROW_LOCKS = ON,
  ALLOW_PAGE_LOCKS = ON) ON [PRIMARY]
  ) ON [PRIMARY]

 GO
 SET ANSI_PADDING OFF
 GO
  /****** Object:  Table [dbo].[Role]    Script Date: 9/1/2020 11:22:40 AM ******/
  SET ANSI_NULLS ON
  GO
 SET QUOTED_IDENTIFIER ON
 GO
 SET ANSI_PADDING ON
 GO
 CREATE TABLE [dbo].[Role](
	[RoleId] [int] NOT NULL,
	[RoleName] [varchar](50) NULL,
  CONSTRAINT [PK_Role] PRIMARY KEY CLUSTERED
  (
	[RoleId] ASC
 )WITH (PAD_INDEX = OFF, STATISTICS_NORECOMPUTE = OFF, IGNORE_DUP_KEY = OFF, ALLOW_ROW_LOCKS = ON,
 ALLOW_PAGE_LOCKS = ON) ON [PRIMARY]
 ) ON [PRIMARY]

  GO
  SET ANSI_PADDING OFF
  GO
  /****** Object:  Table [dbo].[User]    Script Date: 9/1/2020 11:22:40 AM ******/
 SET ANSI_NULLS ON
 GO
 SET QUOTED_IDENTIFIER ON
 GO
 SET ANSI_PADDING ON
 GO
 CREATE TABLE [dbo].[User](
	[UserId] [int] IDENTITY(1,1) NOT NULL,
	[Name] [varchar](50) NULL,
	[Password] [varchar](50) NULL,
  CONSTRAINT [PK_User] PRIMARY KEY CLUSTERED
  (
	[UserId] ASC
  )WITH (PAD_INDEX = OFF, STATISTICS_NORECOMPUTE = OFF, IGNORE_DUP_KEY = OFF, ALLOW_ROW_LOCKS = ON,
  ALLOW_PAGE_LOCKS = ON) ON [PRIMARY]
 ) ON [PRIMARY]

 GO
 SET ANSI_PADDING OFF
 GO
 /****** Object:  Table [dbo].[UserRole]    Script Date: 9/1/2020 11:22:40 AM ******/
 SET ANSI_NULLS ON
 GO
 SET QUOTED_IDENTIFIER ON
 GO
 CREATE TABLE [dbo].[UserRole](
	[UserId] [int] NOT NULL,
	[RoleId] [int] NOT NULL
  ) ON [PRIMARY]

  GO
  ALTER TABLE [dbo].[UserRole]  WITH CHECK ADD  CONSTRAINT [FK_UserRole_Role] FOREIGN KEY([RoleId])
 REFERENCES [dbo].[Role] ([RoleId])
 GO
 ALTER TABLE [dbo].[UserRole] CHECK CONSTRAINT [FK_UserRole_Role]
 GO
 ALTER TABLE [dbo].[UserRole]  WITH CHECK ADD  CONSTRAINT [FK_UserRole_User] FOREIGN KEY([UserId])
 REFERENCES [dbo].[User] ([UserId])
 GO
 ALTER TABLE [dbo].[UserRole] CHECK CONSTRAINT [FK_UserRole_User]
 GO
It will generate 4 tables like below.
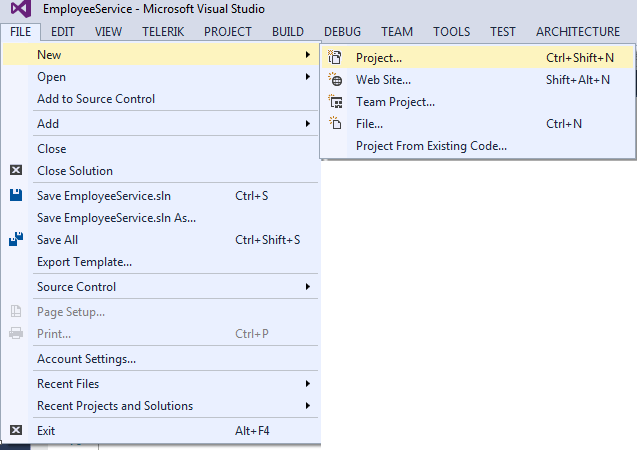
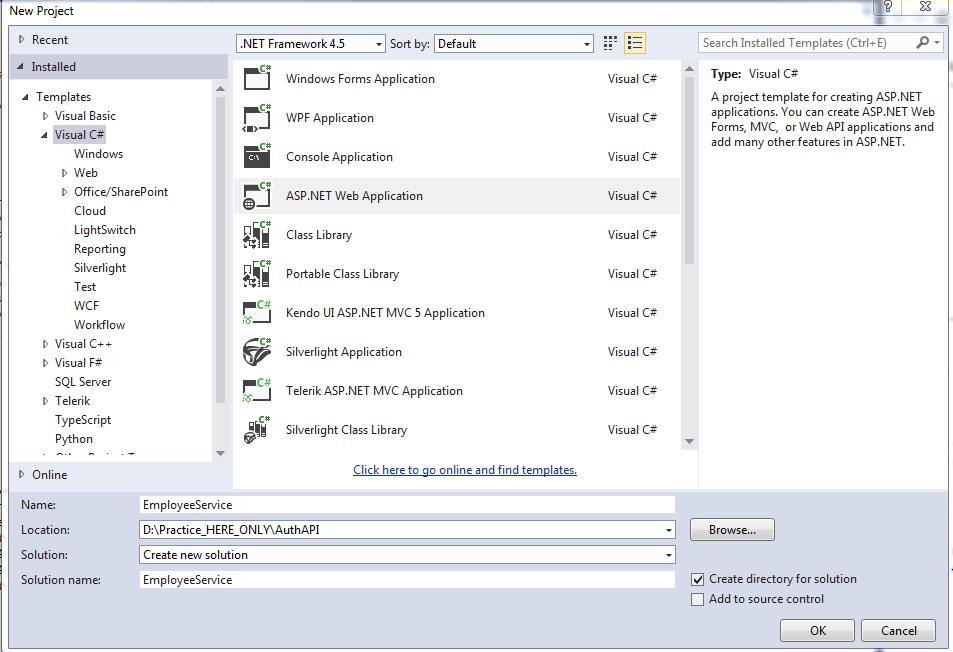
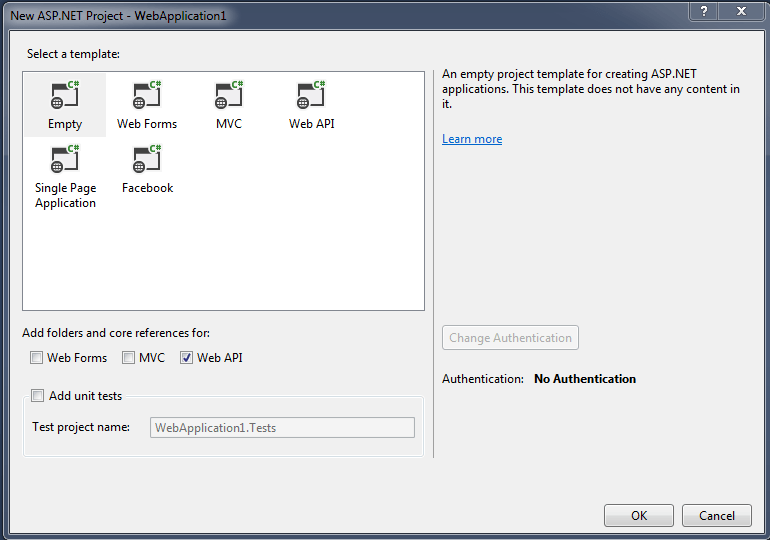
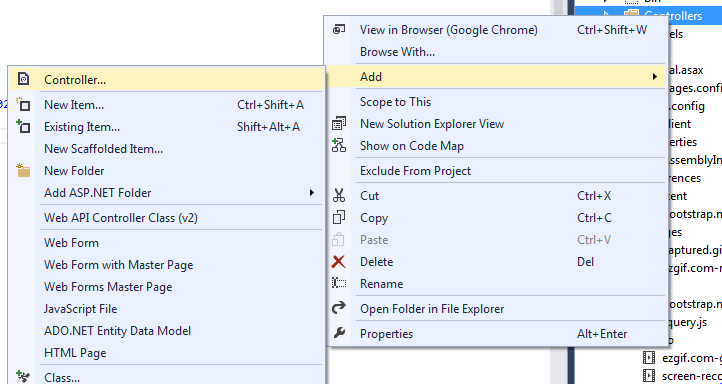
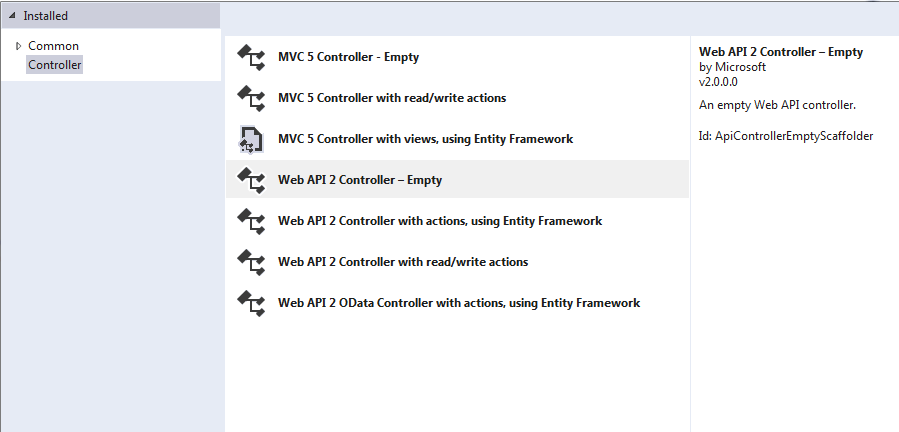
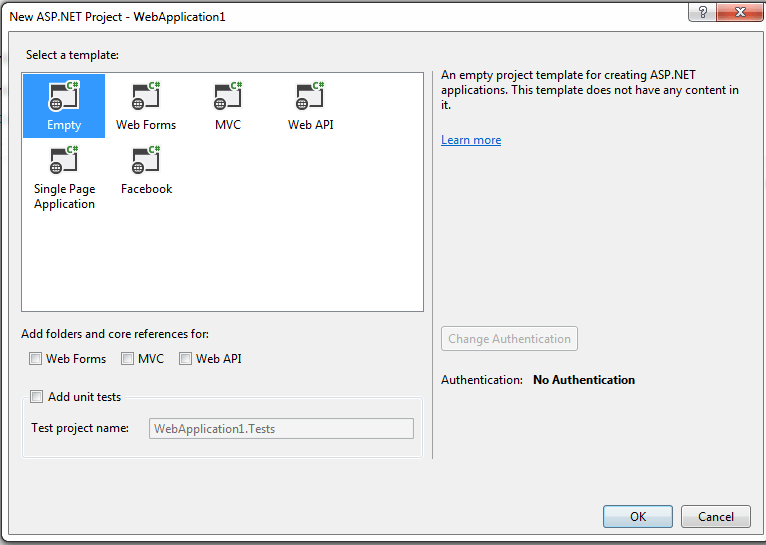
Step 2.Create a web api empty project and name it EmployeeService. and Create a web api 2 empty controller and name it employeecontroller.
• Go to file and select new and then select project .
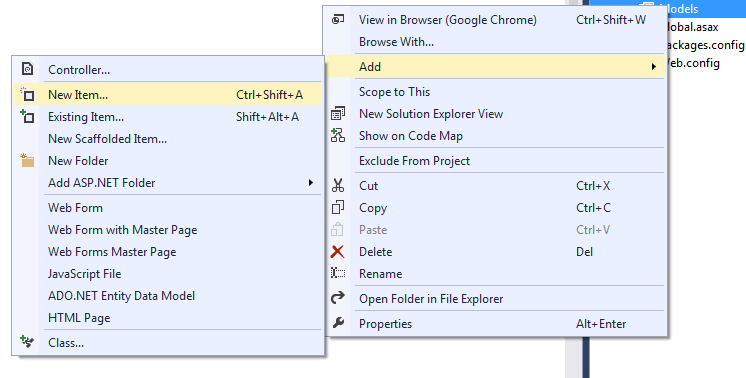
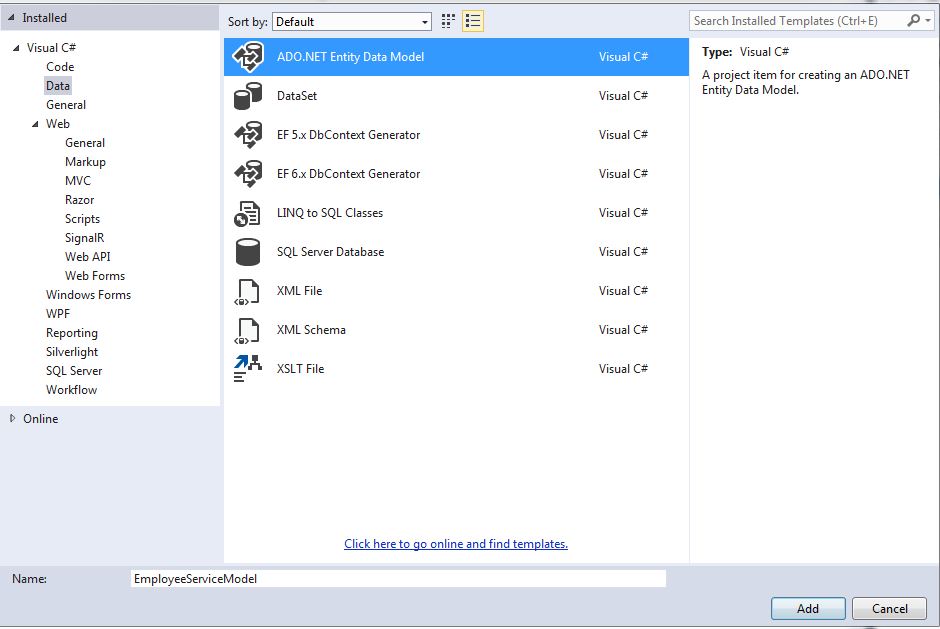
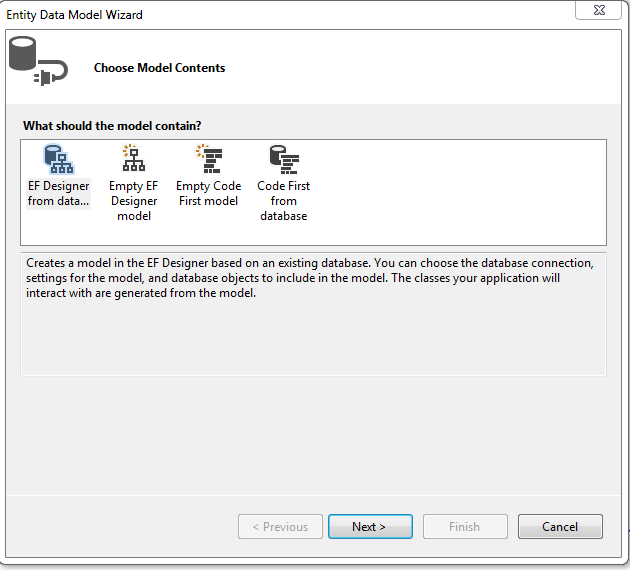
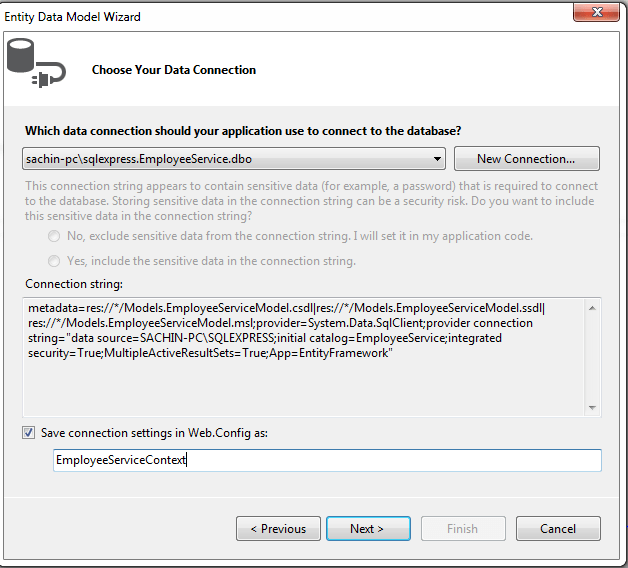
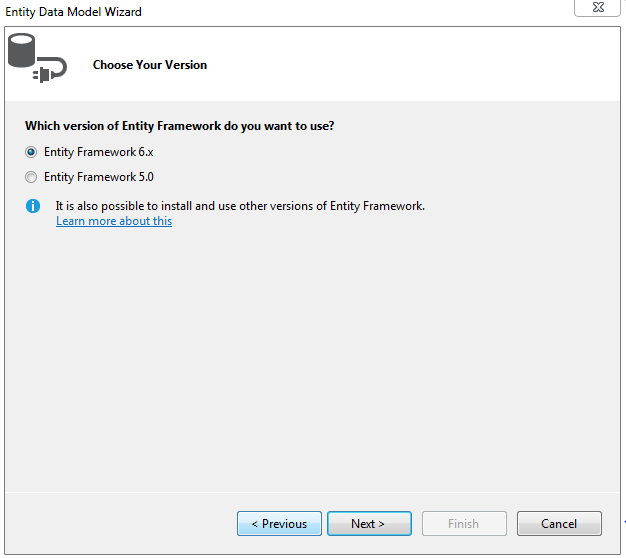
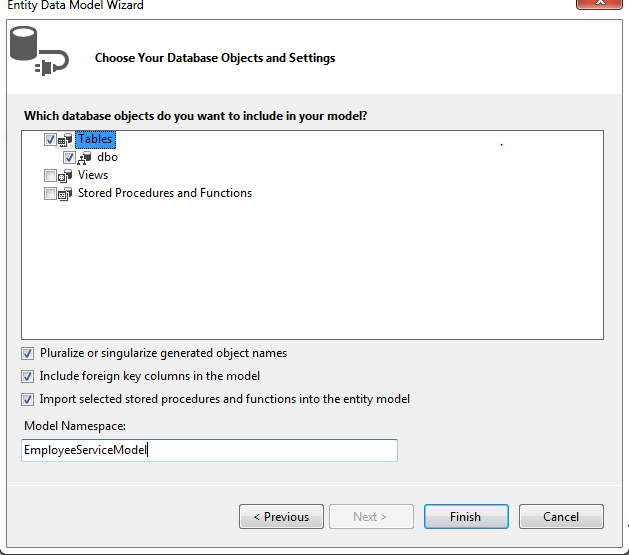
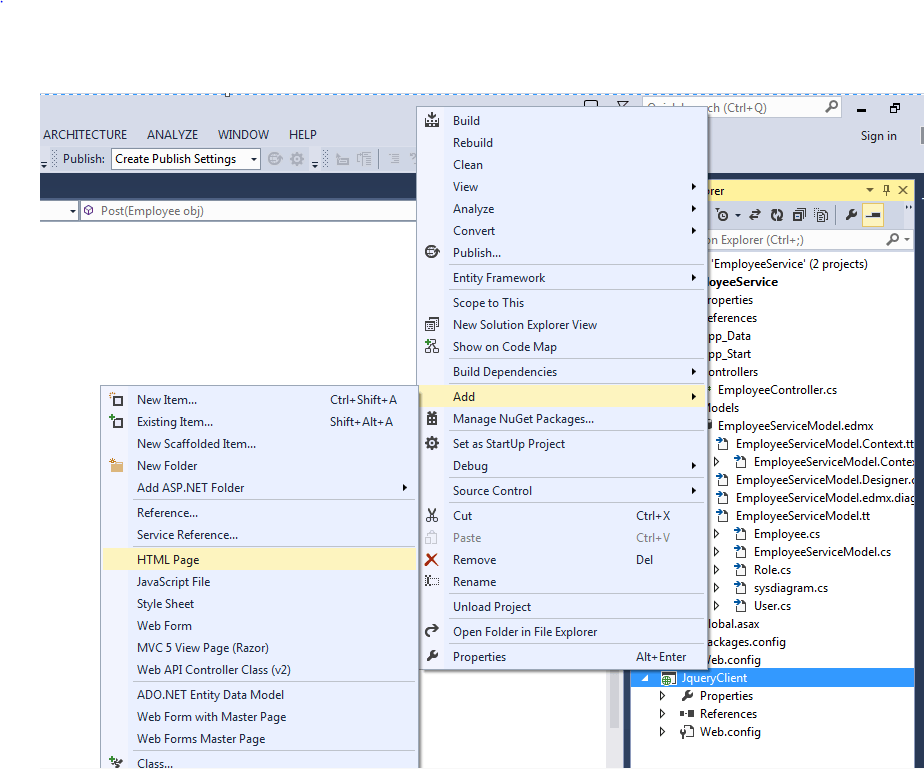
Step 3.Generate entity model from database in the models folder of the project as shown below.
• Right click on the models folder and select add then select new item.
Step 4.Create three methods in the Employee Controller as shown below.
   // [EnableCors(origins: "*", headers: "*", methods: "*", exposedHeaders: "Location", SupportsCredentials = true)]
  // do not uncomment this right now , we will uncomment it later
 public class EmployeeController : ApiController
    {
        EmployeeServiceDbContext db = new EmployeeServiceDbContext();
        public HttpResponseMessage Get()
        {
            try
            {
                var data = db.Employees.ToList();
                if (data != null)
                {
                    return Request.CreateResponse(HttpStatusCode.OK, data);
                }
                return Request.CreateErrorResponse(HttpStatusCode.NotFound, "No result found");
            }
            catch
            {
                return new HttpResponseMessage(HttpStatusCode.InternalServerError);
            }
        }

        public HttpResponseMessage Get(int Id)
        {
         try
            {
                var data = db.Employees.Find(Id);
                if (data != null)
                {
                    return Request.CreateResponse(HttpStatusCode.OK, data);

                }
                return Request.CreateErrorResponse(HttpStatusCode.NotFound, "No Data Found");
            }
            catch
            {
                return new HttpResponseMessage(HttpStatusCode.InternalServerError);
            }
        }

        public HttpResponseMessage Post([FromBody] Employee obj)
        {
            try
            {
                db.Employees.Add(obj);
                db.SaveChanges();
                var msg = Request.CreateResponse(HttpStatusCode.Created, obj);
                msg.Headers.Location = new Uri(Request.RequestUri + obj.Id.ToString());
                return msg;
            }
            catch
            {
                return new HttpResponseMessage(HttpStatusCode.InternalServerError);
            }
        }
    }
Step 5.Open web.config file and set Authentication mode to windows under System.web section.
   <system.web>
   <authentication mode="Windows" />
  </system.web>
At this moment, the Employee service is ready to be deployed on IIS. Let's deploy the web API to IIS, and configure it to use windows Authentication.
Deploy Web API to IIS
The steps to deploy web API to IIS are as follow:
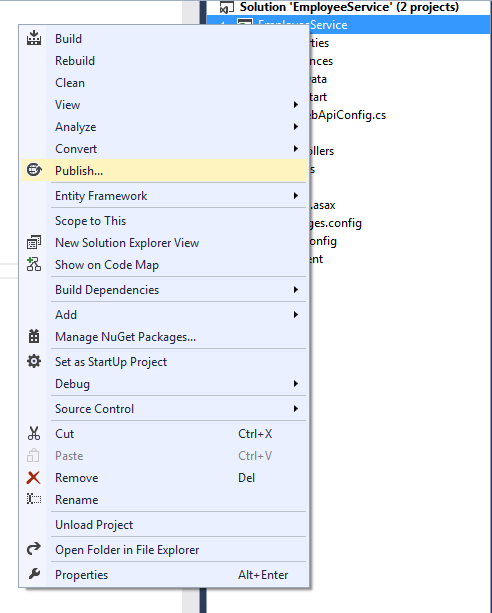
• Right click on the EmployeeService project and select Publish.
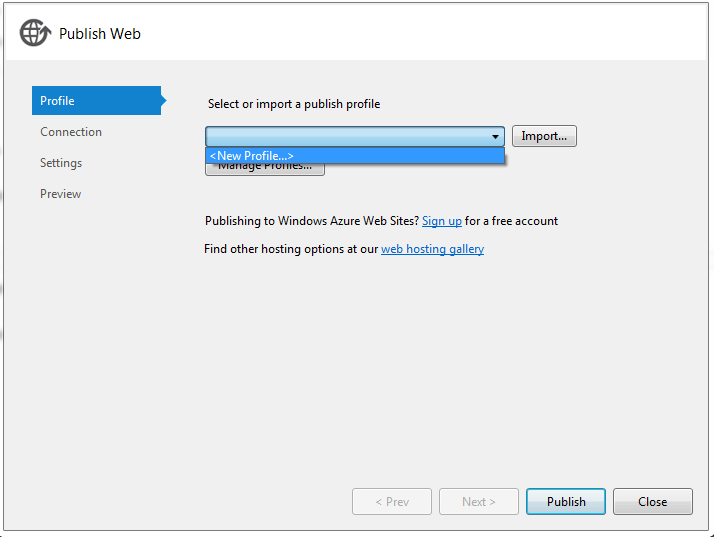
• Create a new publish profile.
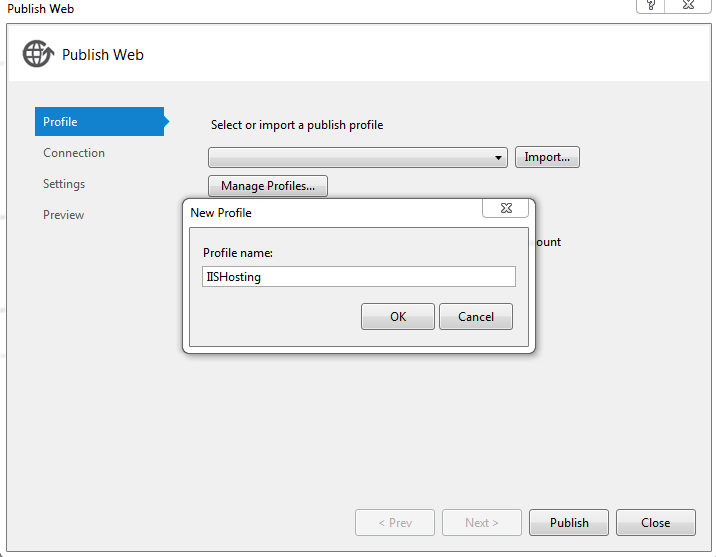
• Give the profile a Name like IISHosting and click ok.
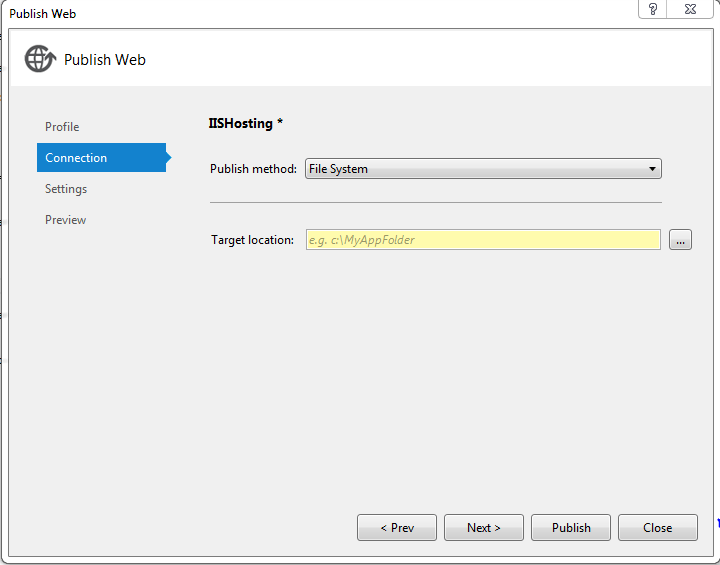
• In the connection tab Select File System as Publish Method and Select the location on your computer where you want to publish the project and click on next.
• In the settings tab select Release mode as configuration and click publish.

• Open IIS Manager ( press window+R and type inetmgr and click open)
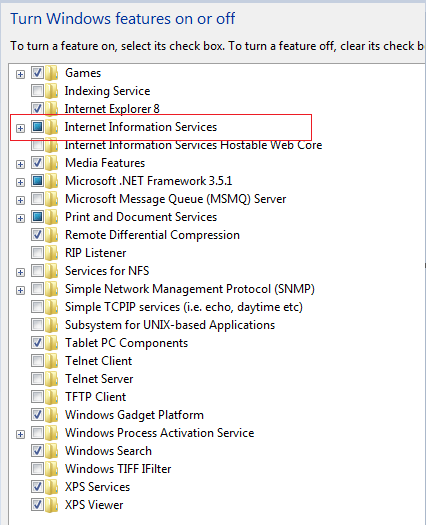
If inetmgr command is not working ,means Run window is unable to find any program with this name then it simply means IIS is not installed on your machine, in that case go to Control Panel--->Programs--->Programs and Features----> Turn windows feature On or Off and Select Internet information services and click ok.
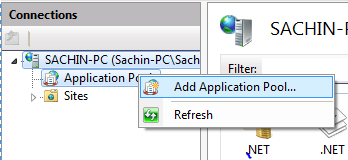
• Right Click on the Application Pool tab and select add application pool.
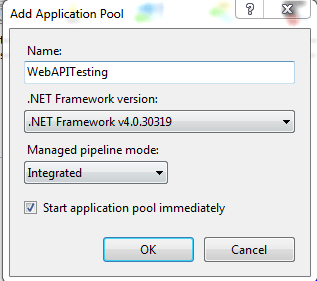
• Give the application pool a name and select .net framework version as .net 4.0 and Managed Pipeline mode as integrated and click ok.
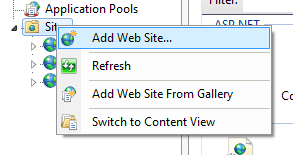
• Right-click on the Sites tab and select add new website. Though Web API is not a website ,IIS handles both the same way.
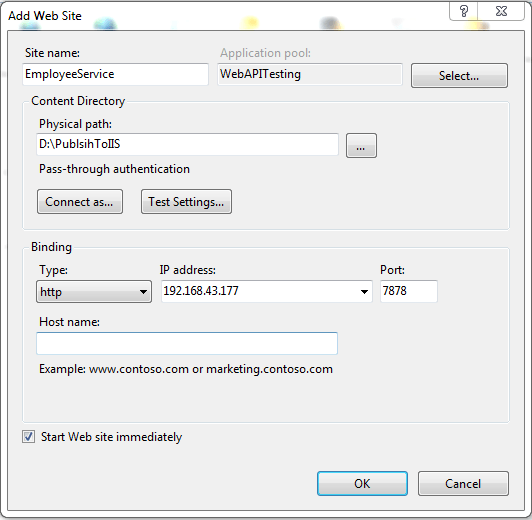
• In the Add Website window, you should be careful while filling the fields.
1. Site Name : EmployeeService.
2. Application Pool : Select the application that we had just created (WebAPITesting).
3. Physical Path :The path on your computer where you have published your web API.
4. Bindings : Type(Http), IP Address (Select the last one in the list),Port (Anything other than 80).
This step is mandatory if you want to test your API from any device on the same network without creating a host.
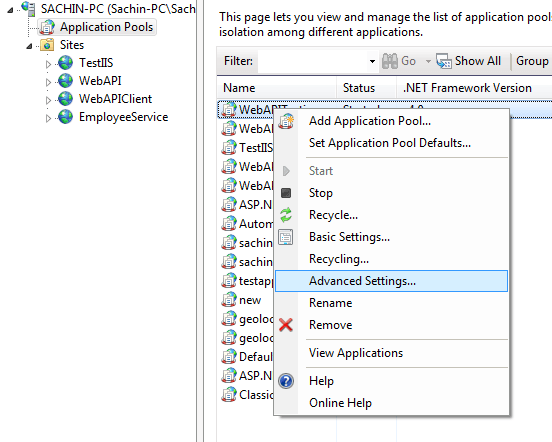
• Double Click the application pools tab , it will open application pool window where all your application pools will be listed .Here select the application pool that we had created in the earlier step and Right click on that and go to Advance settings.
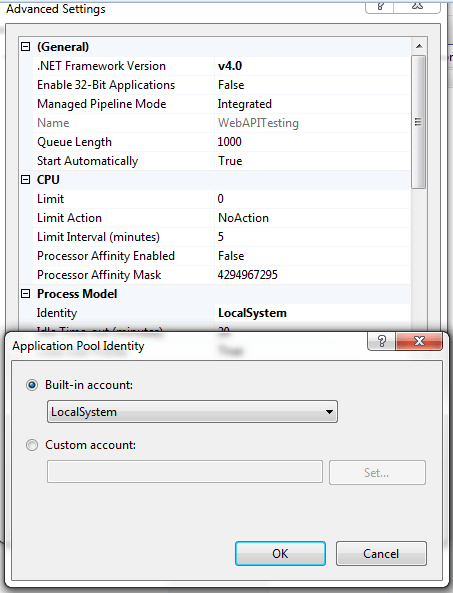
• In the Advance Settings window go to process model and click on identity and select Local System as built-in account.
Congratulation you have successfully published your web API to IIS , now connect at least 4 devices to the same network , if you are a student and your house owner has not provided you WIFI, connect your laptop with your mobile hotspot in this way you will have at least 2 device on the same network.
Open any browser on any device on the network and type the URL http://192.168.43.177:7878/api/employee , you will get the following result.
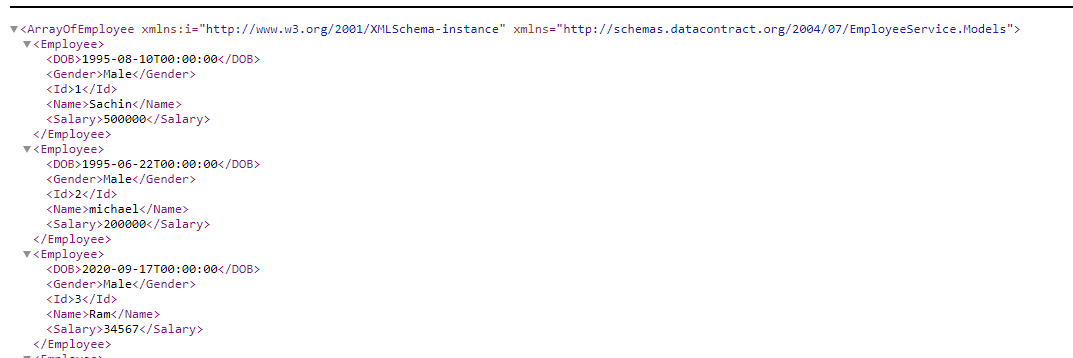
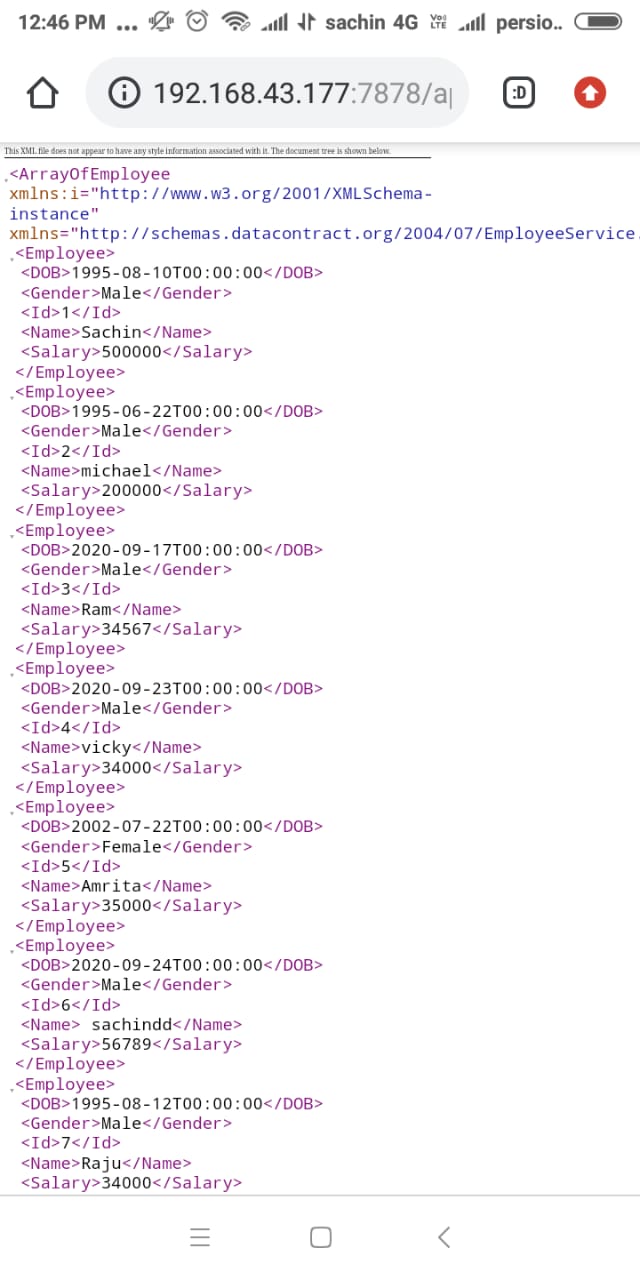
All the idea behind creating a local network is to make you familiar with intranet environment.
Enable windows Authentication in IIS
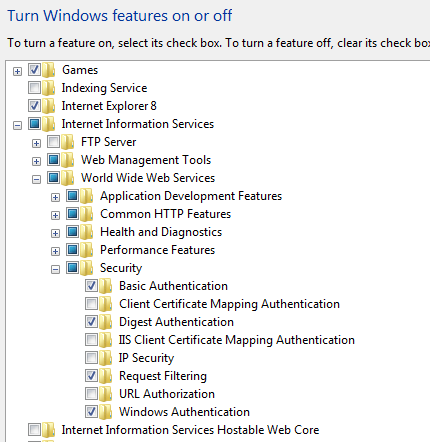
• Go to control panel --> Programs---> program and features ---> Turn windows feature on or off and Select Internet Information Services.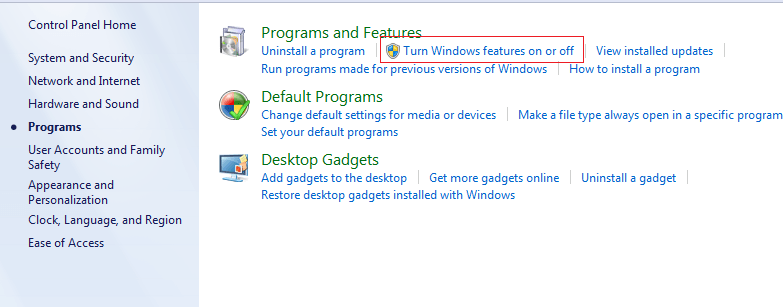
Under Internet Information Services go to World wide web services and under that go to Security and Check Basic Authentication, Digest Authentication and windows authentication as shown below.
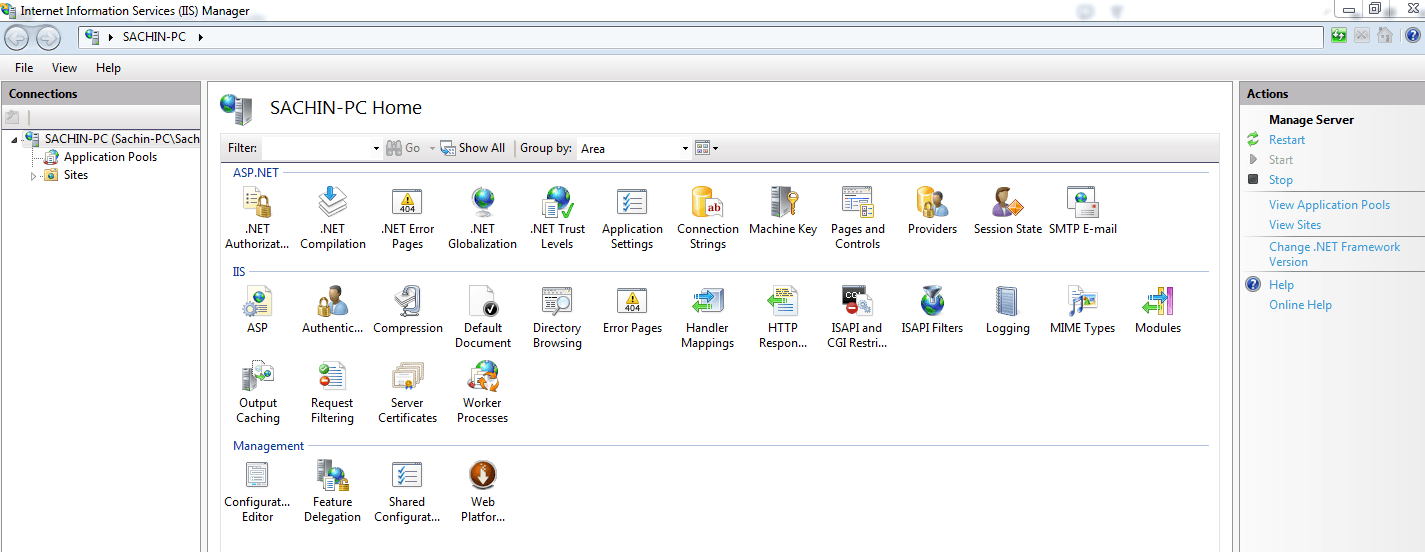
Open IIS Manager (in the run window type inetmgr and hit Enter).
• Open Sites and double click on the recently added web API project that is EmployeeService.
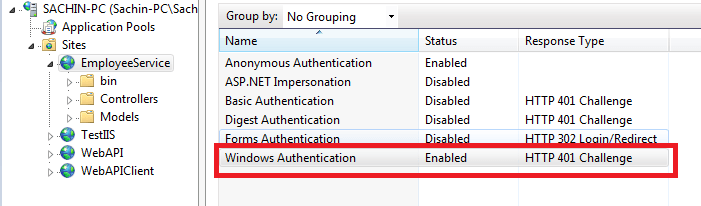
• Double click on Authentication under IIS submenu, it will open the authentication schemes window as shown below.
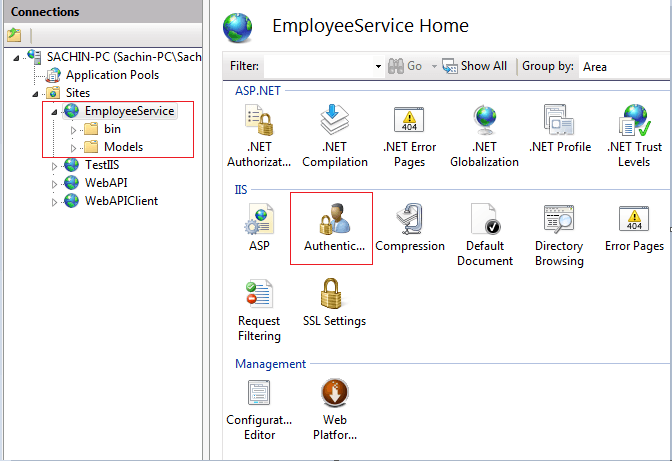
Check the windows Authentication checkbox.
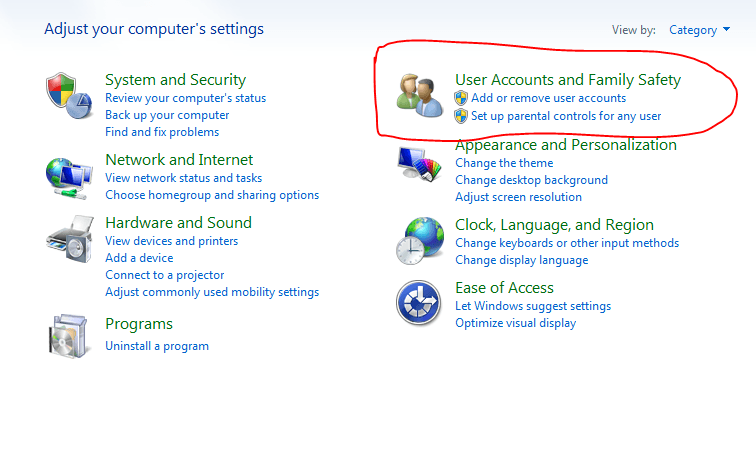
Create some users on your machine, for testing purpose at least create two user accounts.
• Go to control panel ---> User Accounts and Family Safety --->Add or Remove User accounts.
• Add some accounts.
Step 5. Open EmployeeService web API project , go to controller and mark all the methods as Authorize using Authorize attribute, for post method use overloaded version of Authorize attribute and define roles='Admin,Editor,Manager' and Republish the EmployeeService controller, it will publish the modified version.
  [Authorize(Roles="Admin,Editor,Manager")]
   public HttpResponseMessage Post([FromBody]Employee emp)
        {
            try
            {
                db.Employees.Add(emp);
                db.SaveChanges();
                var msg = Request.CreateResponse(HttpStatusCode.Created, emp);
                msg.Headers.Location = new Uri(Request.RequestUri +"/"+ emp.Id.ToString());
                return msg;
            }
            catch
            {
                return new HttpResponseMessage(HttpStatusCode.InternalServerError);
            }
        }
Create a Client Application (Html Client)
Now Let's create a Client Application to test the Web API.
Step 1.Add another project in the solution and name it as JqueryClient and click ok. And in the next window just select empty template and do not tick anything for core refrences.

Step 2.Add an Html page in the JqueryClient Project and Name it ClientOne.
Step 3.Add the Jquery reference in the Html page and paste the below code.
 <!DOCTYPE html>
 <html xmlns="http://www.w3.org/1999/xhtml">
 <head>
    <title>ClientOne</title>
    <link href="Content/bootstrap.min.css" rel="stylesheet" />
    <script src="JS/Jquery.js"></script>
    <script src="JS/bootstrap.min.js"></script>
 </head>
 <body>
    <div class="container">
        <table class="table table-bordered mt-5">
            <tr>
                <td>Name</td>
                <td><input type="text" name="name" value="" id="txtName" /></td>
            </tr>
            <tr>
                <td>DOB</td>
                <td><input type="date" name="dob" value="" id="txtDOB" /></td>
            </tr>
            <tr>
                <td>Gender</td>
                <td>
                    <input type="radio" name="Gender" value="Male" />Male
                    <input type="radio" name="Gender" value="Female" />Female
                </td>
            </tr>
            <tr>
                <td>Salary</td>
                <td><input type="number" name="Salary" value="" id="txtSalary" /></td>
            </tr>
            <tr>
                <td>
                    <button onclick="getEmployeeById()" class="btn btn-danger">Get Employee by Id</button>
                </td>
                <td>
                    <input type="number" name="Id" value="" id="Id" placeholder="Enter employee Id" />


                </td>

            </tr>
            <tr>
                <td>
                    <button onclick="getEmployee()" class="btn btn-primary">Get All Employee</button>
                    <button onclick="Refresh()" class="btn btn-primary">Refresh</button>
                </td>
                <td><button onclick="SaveEmployee()" class="btn btn-success">Add New</button></td>
            </tr>
        </table>

        <table class="table table-bordered" id="main" style="display:none">
            <thead>
                <tr>
                    <th>Id</th>
                    <th>Name</th>
                    <th>DOB</th>
                    <th>Salary</th>
                    <th>Gender</th>
                </tr>
            </thead>
            <tbody></tbody>
        </table>
    </div>

    <script>

        function SaveEmployee() {
            debugger;
            var model = {
           Name:$("#txtName").val(),
           Salary: $("#txtSalary").val(),
           Gender: $(":input[name=Gender]:checked").val(),
           DOB: $("#txtDOB").val(),
            }

            $.ajax({
                "type": "Post",
                "url": "http://192.168.43.177:7878/api/employee",
                "dataType": "json",

                "contentType": "application/json;charset=utf-8",
                "data": JSON.stringify(model),
                "traditional": true,
                "xhrFields": {
                    "withCredentials": true
                },
                "dataTpe": "Json",
                "cache": false,
                "crossDomain": true,
                "success": function (data,status,xhr) {
                    debugger;

                    alert(xhr.getResponseHeader('Location'));
                },

                "error": function (request, message, error) {
                    handleException(request, message, error);
                }
            })

        }

        function getEmployeeById() {
            var id = $("#Id").val();
            debugger;
            $.ajax({
                "type": "get",
                "url": "http://192.168.43.177:7878/api/employee",
                "data":{Id:id},
                "dataType": "Json",
                "xhrFields": {
                    "withCredentials": true
                },

                "cache": false,
                "success": function (data) {
                    debugger;

                    $("#txtName").val(data.Name);
                    $("#txtSalary").val(data.Salary);
                    $(":input[name=Gender][value=" + data.Gender + "]").prop('checked', true);
                    var dob = CovertToDate(data.DOB);
                    $("#txtDOB").val(dob);
                },

                "error": function (request, message, error) {
                    handleException(request, message, error);
                }
            })
        }

        function Refresh() {
            debugger;
            $("#txtName").val("");
            $("#txtSalary").val("");
            $(":input[name=Gender]").prop('checked', false);
            $("#txtDOB").val("");
            $("#Id").val("");
        }

        function handleException(request, message, error) {
            var msg = "";
            msg += "Code: " + request.status + "\n";
            msg += "Text: " + request.statusText + "\n";
            if (request.responseJSON != null) {
                msg += "Message: " +
                       request.responseJSON.Message + "\n";
            }
            alert(msg);
        }

        function CovertToDate(date)
        {
            debugger;
            var dob;
            var d = new Date(date);
            var day = ("0" + d.getDate()).slice(-2);
            var month = ("0" + (d.getMonth() + 1)).slice(-2);
             dob = d.getFullYear() + "-" + (month) + "-" + (day);

            return dob;
        }


        function getEmployee() {
            debugger;
            $.ajax({
                "type": "get",
                "url": "http://192.168.43.177:7878/api/employee",
                "dataType": "Json",
                "xhrFields": {
                    "withCredentials": true
                },
                "cache": false,
              "success": function (data) {

                    $(data).each(function (i, y) {
                        var trr = document.createElement("tr");
                        var dob = CovertToDate(y.DOB);
                        $(trr).append("<td>" + y.Id + "</td>").append("<td>" + y.Name + "</td>").append("<td>" + dob +
   "</td>").append("<td>" + y.Salary + "</td>").append("<td>" + y.Gender + "</td>");
                        $("#main tbody").append(trr);
                    });
                    $("#main").show();

                },
            })
        }

    </script>
  </body>
  </html>
Step 4. If you want to test this in an intranet environment (Like from your phone on the same network) then deploy the Client App in IIS as well, the steps are exactly the same as you have deployed web API.
Step 5.Run the Client application by pressing ctrl+f5 or start button on the menu bar. You will get the below output.
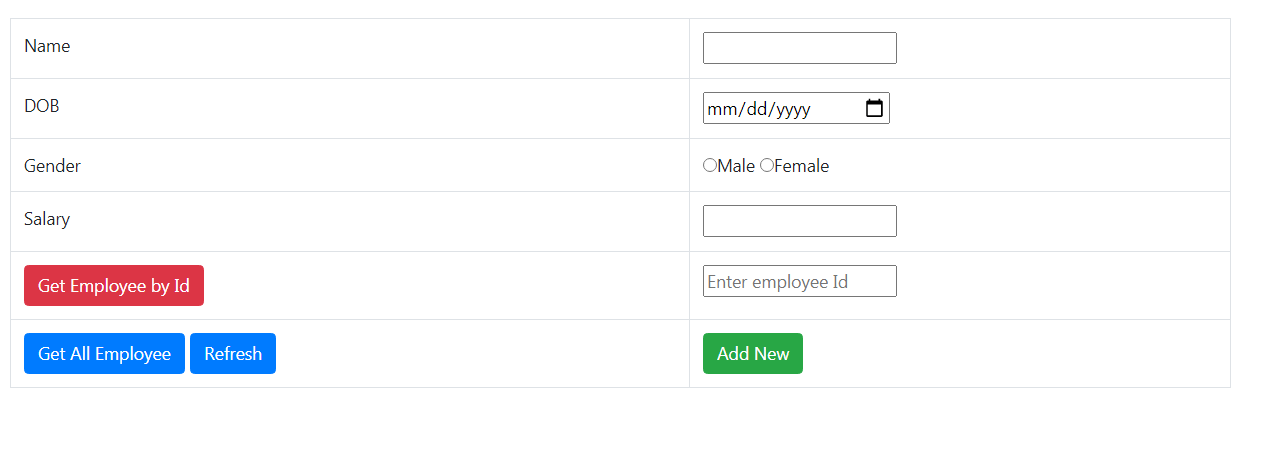
At this moment issue a get request by clicking GetAllEmployee button you will get Cors related error which is logical and self explanatory , In real time the client app have different origin , here different origin means different domain name or port number or scheme(http or https) that is the reason i have created the client App as a different project so that you can take feel of real time project and face the problems that may occur in a live project.

As you can see from the error , browser is not allowing ClientApp to access the resource ('http://localhost:1268/api/employee?Id=1) because the clientApp has the origin http://localhost:1274/ClientOne.html , both have different port number , which is violation of same origin policy.
In order to overcome this problem and to allow the clientApp to access resources on our server , we have to Enable cross-origin requests in ASP.NET Web API 2.
Now , i am considering that you have gone through the article how to enable cross origin request in web api 2 , now it is time to uncomment the Cors attribute on Employee controller and re publish the web API. This time when you will click publish button from visual studio, the web API will be published within few seconds, only the first publish takes time , any successive publish doesn't take time.
At this moment run the client App from anywhere on the same network, and you will successfully be able to Get All Employees and Get a particular Employee by Id but you will not be able to Create Employee because of the Role Constraint.
Note: I am setting withCredentials property of the request object to true, that causes existing authentication headers/cookies to be passed along in the AJAX request
Custom Role Providers for Windows Authentication
We are going to leverage the RoleProvider class to make our own custom role provider so that we can have our own application-specific roles without moving users into AD groups. This method can be applied to other forms of authentication other than just Windows.
The Custom role provider is pretty straightforward to create. First, we need to create a new class that inherits from the System.Web.Security.RoleProvider. Next, implement the methods you wish to override and leave the rest throwing a NotImplementedException. In the example below, I override the IsUserInRole and GetRoleForUsers to get user role(s) from the database.
Step 1.Open Employee Service web API project and create a folder with name Repository. Under Repository Folder create a class and name it as UserRepository, obviously in the real-time project you should create another layer for it .
In the user repository we are going to create an in-memory user object with user name as windows account name and password as windows password and assign roles to them, you can save your windows user name and password in the database as well but saving windows user accounts in the database is not making sense to me, so I am creating in-memory objects. Remember we had generated our entities in the model folder and we have all Entities that we need right now.
Step 2.Add some users and Roles to the EmployeeService database. The user name should be windows user accounts name, which should be your {PC name}\{userAccount name}
  SET IDENTITY_INSERT [dbo].[Role] ON
  INSERT INTO [dbo].[Role] ([RoleId], [RoleName]) VALUES (1, N'Admin')
  INSERT INTO [dbo].[Role] ([RoleId], [RoleName]) VALUES (2, N'Editor')
  INSERT INTO [dbo].[Role] ([RoleId], [RoleName]) VALUES (3, N'Manager')
  SET IDENTITY_INSERT [dbo].[Role] OFF
  SET IDENTITY_INSERT [dbo].[User] ON
  INSERT INTO [dbo].[User] ([UserId], [Name], [Password]) VALUES (1, N'Sachin-pc\Administrator', N'Admin123')
  INSERT INTO [dbo].[User] ([UserId], [Name], [Password]) VALUES (2, N'Sachin-pc\Editor', N'Editor123')
  INSERT INTO [dbo].[User] ([UserId], [Name], [Password]) VALUES (3, N'Sachin-pc\User', N'User123')
  SET IDENTITY_INSERT [dbo].[User] OFF

  INSERT INTO [dbo].[UserRole] ([UserId], [RoleId]) VALUES (1, 1)
  INSERT INTO [dbo].[UserRole] ([UserId], [RoleId]) VALUES (1, 2)
  INSERT INTO [dbo].[UserRole] ([UserId], [RoleId]) VALUES (2, 2)
  INSERT INTO [dbo].[UserRole] ([UserId], [RoleId]) VALUES (3, 3)
  namespace EmployeeService.Repository
  {
    public class UserRepository
    {
        public  List<string> GetRoles(string UserName)
        {
            List<string> allRoles = new List<string>();
            List<Role> roles = db.Users.Where(x => x.Name == UserName).SelectMany(x => x.Roles).ToList();
            foreach (var role in roles)
            {
                allRoles.Add(role.RoleName);
            }
            return allRoles;
        }
        public bool ValidateUser(string userName,string Password)
        {
            bool UserExist = db.Users.Any(x => x.Name == userName && x.Password == Password);
            if (UserExist)
            {
                return true;
            }
            return false;
        }
    }
  }
Step 2.Open Employee Service web API project and Create a folder with name RoleProviders. Inside that create a class and name it CustomRoleProvider and paste the below code. The Code is self explanatory.
Note : Inherit CustomRoleProvider from RoleProvider (Namespace:- System.Web.Security;)
   public class CustomRoleProvider : RoleProvider
    {
        public CustomRoleProvider() { }

        public override bool IsUserInRole(string username, string roleName)
        {
            List<string> roles = UserRepository.GetRoles(username);
            return roles.Count != 0 && roles.Contains(roleName);
        }

        public override string[] GetRolesForUser(string username)
        {
            List<string> roles = UserRepository.GetRoles(username);
            return roles.ToArray();
        }

        #region Not Implemented Methods

        public override void AddUsersToRoles(string[] usernames, string[] roleNames)
        {
            throw new NotImplementedException();
        }

        public override string ApplicationName
        {
            get
            {
                throw new NotImplementedException();
            }
            set
            {
                throw new NotImplementedException();
            }
        }

        public override void CreateRole(string roleName)
        {
            throw new NotImplementedException();
        }

        public override bool DeleteRole(string roleName, bool throwOnPopulatedRole)
        {
            throw new NotImplementedException();
        }

        public override string[] FindUsersInRole(string roleName, string usernameToMatch)
        {
            throw new NotImplementedException();
        }

        public override string[] GetAllRoles()
        {
            throw new NotImplementedException();
        }

        public override string[] GetUsersInRole(string roleName)
        {
            throw new NotImplementedException();
        }

        public override void RemoveUsersFromRoles(string[] usernames, string[] roleNames)
        {
            throw new NotImplementedException();
        }

        public override bool RoleExists(string roleName)
        {
            throw new NotImplementedException();
        }

        #endregion
    }
Step 3.Open Web.config and under System.web section paste below code.
<roleManager cacheRolesInCookie="true" defaultProvider="CustomRoleProvider"
  enabled="true">
      <providers>
        <clear />
        <add name="CustomRoleProvider"
 type="EmployeeService.RoleProviders.CustomRoleProvider,EmployeeService" />
      </providers>
    </roleManager>
Note : type={Fully qualified name of your role provider class which is namespace name(dot)ClassName , Assembly Name}
Step 4. Obviously we have added some new folders and classes to EmployeeService (web API) project , so republish the project. Don't worry it will not take time , only the first publish takes time.
we have successfully implemented windows authentication with role based Authorization.
If the server runs on a corporate network that is using Microsoft Active Directory service domain identities or other Windows accounts to identify users.You can specify which users or groups are permitted to have access to what resources by adding Authorization settings in the Web.config file as follows:
• To permit all users of an NT Group named Managers to have access to your resources, use the following code:
<configuration>
  <system.web>
    <authorization>
      <allow roles="domainname\Managers" />
      <deny users="*" />
    </authorization>
  </system.web>
  </configuration>
•To permit only specific users to have access, use the following code:
  <system.web>
    <authorization>
      <allow users="domainname\user1,domainname\user2,domainname\user3" />
      <deny users="*" />
    </authorization>
  </system.web>
 </configuration>
Note: You can specify multiple roles or users by using a comma separated list. Verify that you use the correct case when you specify the configuration file element and the associated attribute values. This code is case sensitive.
Does windows Authentication not work without deploying the Application into IIS
When we run or debug the application from Visual Studio it is not hosted in IIS, instead it hosts in IISExpress which is part of the Visual Studio and stores the minimum required configuration or default configuration to run any application. It means even after following each step religiously , windows Authentication will not work until you don't host your web API into IIS, but we are developers we do want to check whether our Application is working properly or not before deploying it to IIS. Don't worry windows Authentication works even you don't deploy it on IIS.
To enable windows authentication set (
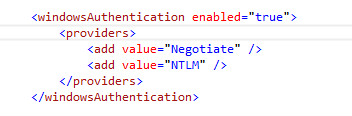
If I won't tell you , I am very sure you will never find “applicationhost.config” file's location. So here ,I am providing you the exact path of “applicationhost.config”.In older Visual Studio releases (such as 2012/2013), a global IIS Express configuration file can be found at %userprofile%\documents\iisexpress\config\applicationhost.config or %userprofile%\my documents\iisexpress\config\applicationhost.config