So far, we have learned how to use a code-first workflow with a blank database and an existing one, but when we create a model, it is very unlikely that it will stay the same through the life of the project, there is always a need to change our model, and we know that with code-first workflow, first, we change the model and then use migrations to bring the database up to date.
Naming convention for Migration
Sometimes we have a migration that does not have equivalent model representation like creating views, stored procedure, triggers, or seeding database table with reference data, they are purely database objects, so we should always prefer to use a database-centric name instead of a model-centric name.
For example if you have created a new class and added a migration then you have two option for naming the migration
• Model centric name like addedEmployeeClass or
• Database centric name like addedEmployeeTable
I always prefer the second option that is database centric name , so I will recommend you too the same.
Types of model changes
Let's discuss every possible change on a domain model and try to find out the correct way to handle them. These are the possible scenarios we may face while creating domain model using code-first workflow.
• Adding a new class
• Modifying an existing class
• Deleting an existing class
Before we get started , remember a golden rule of sum , always work on small changes and small migrations. Instead of making 10 changes to your model at once , make a small change add migration and run that migration to bring the database up to date. It is because when you work on large migration then there is always a chance of error and recovering from a migration error is really tough , with small migrations you reduce the chance of errors significantly.
Setting the stage
Before exploring the changes, let's first set the stage , let's create a simple domain model using code-first approach and then we will discuss each possible change on a business model.
Step 1. Go to Visual Studio and create a new console application , Name it as CodeFirstDemo.
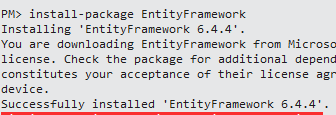
Step 2.Similar to Database-First workflow , as it is a new project we need to install Entity Framework First. To do that , we use package manager console.
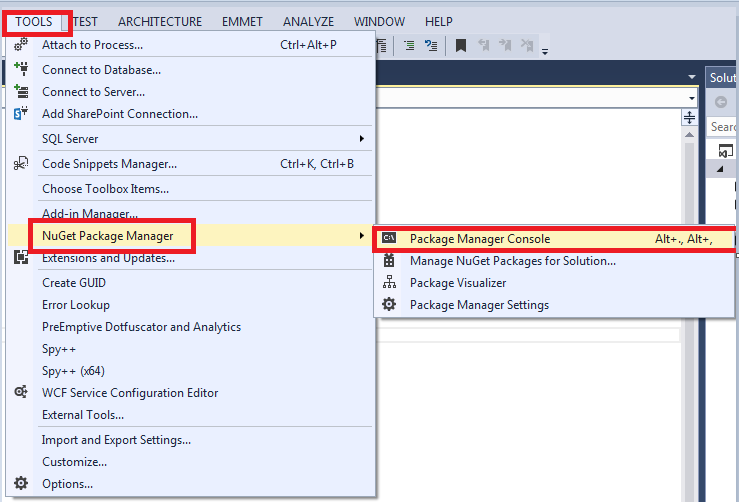
• Go to Tools.
• Select Nuget Package Manger and Then Package Manager Console.
• Install Entity Framework using the install-package command.
Install-Package EntityFramework -Version 6.2.0
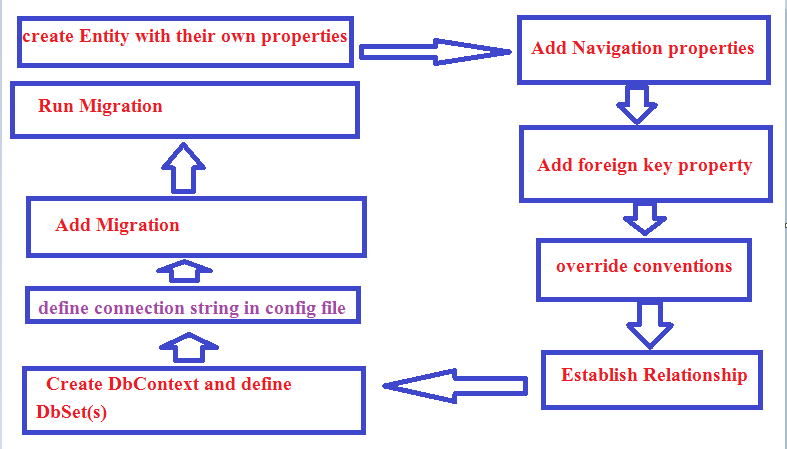
Step 3. Now, with the Code-First of Course we start with the code , so we do not need to go to Management Studio and create tables , instead here we create our domain classes all by ourselves. Add two class Files in your project with the name of Employee and Department respectively as shown in below code.
  public class Department
    {
        public int Id { get; set; }
        public string Name { get; set; }
        public ICollection<Employee> Employees { get; set; }
    }
  public class Employee
    {
        public int Id { get; set; }
        public string Name { get; set; }
       [ForeignKey("Department")]
        public int DepId { get; set; }
        public Department Department { get; set; }
    }
Notice the class looks exactly the same as the one EF generated for us as a part of Database-First work Flow , but here we have created it by hand. Each employee belongs to a Department so we use Department as a property in Employee Class , similarly a Department can have multiple Employees so we have used ICollection of Employee. This is needed for the association , we will discuss more about relationship and association in our later article.
Step 4. Now, In Companion to our Domain Classes we also need a DbContext Class , so that we could interact with the database later in our project.
Basically we have to create a class which derives from DbContext and exposes one or more DbSet . In our case, DbSet of Employee and Department.
So , add a new class file and Name it as OrganizationDbContext and copy -paste the below code.
  public class OrganizationDbContext:DbContext
    {
        public DbSet<Employee> Employees { get; set; }
        public DbSet<Department> Departments { get; set; }
    }
Step 5. Next , we need to specify the connection string , so that EF could connect to server and generate database and tables for us.
Go to app.config and add a connection String, name it as the name of your DbContext , because EF works on convention over configuration.
 <connectionStrings>
 <connectionStrings>
 <add name="OrganizationDbContext" connectionString="Data Source=SACHIN-PC\SQLEXPRESS;Initial Catalog=OrganizationDB;Integrated
  Security=True" providerName="System.Data.SqlClient"/>
 </connectionStrings>
Please Notice , here we have explicitly specified one additional property to the connection string that is provider name as Sytem.Data.SqlClient. This is required to work with code First.
Step 6. Next we need to go to package Manager console and Enable Migrations. This is the code that we run once for the life time of the project.
PM> Enable-Migrations
Notice , a migration folder has been added to our project.
Step 7. Next we need to add a migration . Go to your Package Manager Console and use Command Add-Migration and give it a meaningful name based on the changes you have made to your model class. It is our first migration so we simply name it as AddedEmployeeAndDepartment.
PM> Add-Migration AddedEmployeeAndDepartment
Notice:- Under Migration folder a new migration file has been created , the name is a combination of date time stamp and description , which is very similar to our change script that we had created to keep track of changes in our database and to manage different versions of it while working with database-first workflow. In Database-First work flow we had created that manually but here we did the same but in more automated fashion.
Step 8. Run the migration against database . To run the migration go to package manager console and run below code.
PM> update-database
when we run the migration , the EF looks at our database and figures out which migration it needs to run on the server to bring it up to date , it converts the migration into SQL code and runs into the database.
Now , let's see the results , Go back to SSMS and Notice EF has created a Database OrganizationDb based on the name of database we had specified in the connectionstring , notice along with the table it also created a MigrationHistory object , so that it could run it on server whenever it needs. The table structure looks exactly the same as we had created manually while working with database first approach.

Unfolding Migration Folder
A migration Folder contains two things
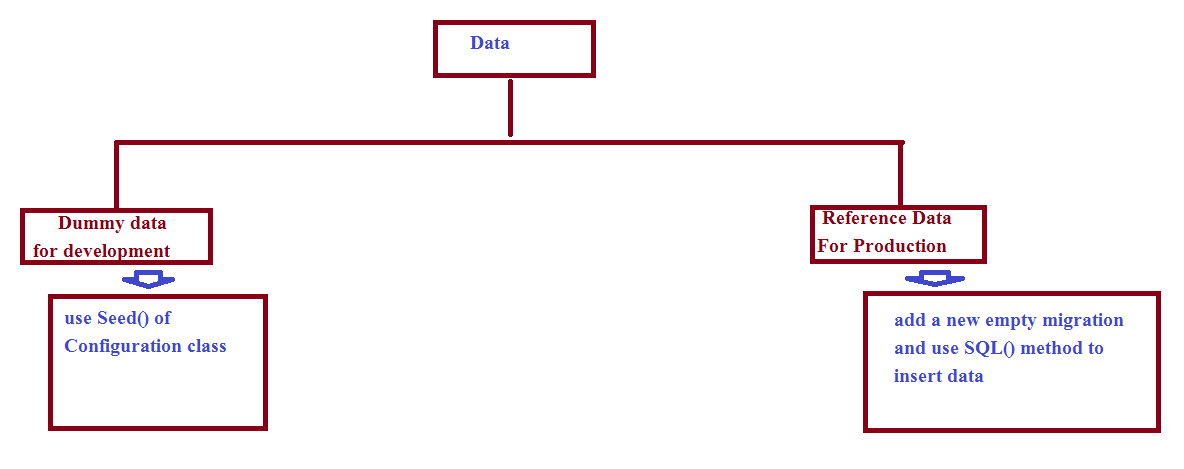
1. A configuration folder, which is used to seed the database with dummy data, which we will discuss in later articles.
2. The actual migration files.
Let's check what does a Migration.cs file contain.
  public partial class AddedEmployeeAndDepartment : DbMigration
    {
        public override void Up()
        {
            CreateTable(
                "dbo.Departments",
                c => new
                    {
                        Id = c.Int(nullable: false, identity: true),
                        Name = c.String(),
                    })
                .PrimaryKey(t => t.Id);

            CreateTable(
                "dbo.Employees",
                c => new
                    {
                        Id = c.Int(nullable: false, identity: true),
                        Name = c.String(),
                        Department_Id = c.Int(),
                    })
                .PrimaryKey(t => t.Id)
                .ForeignKey("dbo.Departments", t => t.Department_Id)
                .Index(t => t.Department_Id);
        }

        public override void Down()
        {
            DropForeignKey("dbo.Employees", "Department_Id", "dbo.Departments");
            DropIndex("dbo.Employees", new[] { "Department_Id" });
            DropTable("dbo.Employees");
            DropTable("dbo.Departments");
        }
    }
1. The name of the migration class is what we specify while adding the migration using the package manager console.
2. Surprisingly enough it doesn't contain any SQL query rather it contains two methods with plain c# code.
3. The Up() method simply contains the changes that we do in our Context class or Domain models.
4. The Down() method contains the opposite of whatever is there in Up() method.
5. Notice EF uses convention over configuration so the column with the Name Id automatically becomes the primary key for the table not only this EF makes it an Identity column as well.
6. In simple terms when EF looks at our model classes then based on the Name and the Type of properties, it figures out how the database should look like for example it knows that Id is typically used for the primary key, and often it is an identity column so it automatically marks the column as Identity, similarly based on Association, aggregation, and composition it automatically adds the required foreign keys.
How to manage changes in domain Model or Context Class correctly
whenever we make a change in Context Class or Domain Classes ,we just need to add a new Migration using Add-Migration command and run it against the database by using the update-database command , we obviously use package manager console to run these commands.
Adding a new class
Let's add a new class into our project and bring the change into database.
Step 1. Add a new class into the project as shown in below code
  public class Product
    {
        public int Id { get; set; }
        public string Name { get; set; }
        public decimal Price{ get; set; }
    }
Step 2. Add the DbSet of Employee to your DbContext class.
    public class OrganizationDbContext : DbContext
            {
                public DbSet<Employee> Employees { get; set; }
                public DbSet<Department> Departments { get; set; }
                public DbSet<Product> Products { get; set; }
            }
Step 3. Create a new migration.
PM> Add-Migration addedProductTable
Step 4. Analyze the migration
  public partial class addedProductTable : DbMigration
    {
        public override void Up()
        {
            CreateTable(
                "dbo.Products",
                c => new
                    {
                        Id = c.Int(nullable: false, identity: true),
                        Name = c.String(),
                        Price = c.Decimal(nullable: false, precision: 18, scale: 2),
                    })
                .PrimaryKey(t => t.Id);
        }

        public override void Down()
        {
            DropTable("dbo.Products");
        }
    }
As you can , Entity Frameworks considers Int and decimal as not null , so in our case Id and Price columns are not null , which is correct but string are considered as varchar(Max) by EF which is undesirable , we don't want our Name column to be of Max length , we will learn to override convention in later articles.
Step 5. Run the Migration
PM> update-database
Now , go to SSMS and you will notice a new table with name product has been successfully added to OrganizationDb database.Thus adding a new class and bringing database up to date is fairly simple.
Modifying an existing class
An existing class can be modified by following ways
• By adding a new property
• By Modifying an existing property or
• By deleting an existing property.
Adding a new property
Let's add a new property to the product class say Product Description.
Step 1. Add the property to the class.
  public class Product
        {
            public int Id { get; set; }
            public string Name { get; set; }
            public decimal Price { get; set; }
            public string ProductDescription { get; set; }
        }
Step 2. Add a new Migration.
PM> Add-Migration addedProductDescriptionColumnToProductTable
Step 3.Analyze the generated migration.
   public partial class addedProductDescriptionColumnToProductTable : DbMigration
    {
        public override void Up()
        {
            AddColumn("dbo.Products", "ProductDescription", c => c.String());
        }

        public override void Down()
        {
            DropColumn("dbo.Products", "ProductDescription");
        }
    }
As you can see, The migration just contains a single line of code which will add a new column to database of type varchar(Max) as C# string type maps to varchar(max) type of SQL Server , so it is a pretty safe migration to run against the database.
Step 4. Run the migration
Update-database
Now go to SSMS , you will notice a new column has been successfully added to your product table, thus adding a new property and bringing database up to date is also straight forward , we just need to add migration and run it against the database using update-database command.
Modifying an Existing property
Let's rename the product's Price property as ProductPrice and add a new migration.
Step 1. Rename the property.
   public class Product
        {
            public int Id { get; set; }
            public string Name { get; set; }
            public decimal ProductPrice { get; set; }
            public string ProductDescription { get; set; }
        }
Step 2. Add a new migration.
PM> Add-Migration RenamedPriceToProductPrice
Step 3. Analyze the generated migration.
  public partial class RenamedPriceToProductPrice : DbMigration
    {
        public override void Up()
        {
            AddColumn("dbo.Products", "ProductPrice", c => c.Decimal(nullable: false, precision: 18, scale: 2));
            DropColumn("dbo.Products", "Price");
        }

        public override void Down()
        {
            AddColumn("dbo.Products", "Price", c => c.Decimal(nullable: false, precision: 18, scale: 2));
            DropColumn("dbo.Products", "ProductPrice");
        }
    }
As you can see, instead of renaming the column, EF is simply creating a new column and dropping the old one, which is not correct, because if we run this migration then we will lose all data for our ProductPrice column, which may break our application, so obviously it is a dangerous migration which needs to be taken care of before running the migration blindly.
we can modify the Migration code generated by Entity Framework and could use RenameColumn extension method which takes 3 parameters like name of the table, old column name, and new column name to actually rename the column instead of creating a new column as shown in below code.
       public override void Up()
        {
            RenameColumn("Product", "Price", "ProductPrice");
        }
But before running the migration, remember that if you ever modify your Up() method then you need to modify the Down() method as well and make sure that it is doing the exact opposite of your Up() method , otherwise you may get undesired results while downgrading your database for versioning purposes. so , your migration should look like as shown below.
 public partial class RenamedPriceToProductPrice : DbMigration
    {
        public override void Up()
        {
            RenameColumn("dbo.Products", "Price", "ProductPrice");
        }

        public override void Down()
        {
            RenameColumn("dbo.Products", "ProductPrice", "Price");
        }
    }
Step 5. Run the migration
PM>update-database
Now go to SSMS , you will find the column name has been successfully updated.
Delete a property
Let's delete the ProductDescription property and bring the database up to date.
Step 1. Delete the property.
  public class Product
        {
            public int Id { get; set; }
            public string Name { get; set; }
            public decimal ProductPrice { get; set; }
        }
Step 2. Add a new migration.
PM> add-migration deletedProductDescriptionColumn
Step 3. Analyze the generated migration.
  public partial class deletedProductDescriptionColumn : DbMigration
    {
        public override void Up()
        {
            DropColumn("dbo.Products", "ProductDescription");
        }

        public override void Down()
        {
            AddColumn("dbo.Products", "ProductDescription", c => c.String());
        }
    }
As you can see the migration is safe to run against the database .
Step 4.Run the migration.
PM> update-database
Now go to SSMS and you will find the column has been successfully deleted.
Delete an Existing Class
The last migration scenario is to delete an existing class. So , let's delete the product class.
Step 1. Delete the class and Remove DbSet of that class for example DbSet<Product> from DbContext.
   public class OrganizationDbContext : DbContext
            {
                public DbSet<Employee> Employees { get; set; }
                public DbSet<Department> Departments { get; set; }
            }
Step 2. Add a new migration.
PM> add-migration deletedProductTable
Step 3. Analyze the generated migration.
   public partial class deletedProductTable : DbMigration
    {
        public override void Up()
        {
            DropTable("dbo.Products");
        }

        public override void Down()
        {
            CreateTable(
                "dbo.Products",
                c => new
                    {
                        Id = c.Int(nullable: false, identity: true),
                        Name = c.String(),
                        ProductPrice = c.Decimal(nullable: false, precision: 18, scale: 2),
                    })
                .PrimaryKey(t => t.Id);
        }
    }
  }
Before running this migration you need to make sure that there is no reference to this class in your project and obviously, you will get a compilation error if you will have any reference of the deleted class.
Side Note: sometimes you may need to preserve data even after the deletion of the table for some historical reasons, so it better is to create a history table move your all data to that history table and then delete the table, to achieve this you can modify your migration class as shown below.
   public partial class deletedProductTable : DbMigration
    {
        public override void Up()
        {
            CreateTable(
                "dbo._Products",
                c => new
                {
                    Id = c.Int(nullable: false, identity: true),
                    Name = c.String(),
                    ProductPrice = c.Decimal(nullable: false, precision: 18, scale: 2),
                })
                .PrimaryKey(t => t.Id);
            Sql("Insert  into dbo._Products select Name,ProductPrice from dbo.Products");
            DropTable("dbo.Products");
        }

        public override void Down()
        {
            CreateTable(
                "dbo.Products",
                c => new
                    {
                        Id = c.Int(nullable: false, identity: true),
                        Name = c.String(),
                        ProductPrice = c.Decimal(nullable: false, precision: 18, scale: 2),
                    })
                .PrimaryKey(t => t.Id);
            Sql("Insert * into dbo.Products select Name,ProductPrice from dbo._Products");
            DropTable("dbo._Products");

        }
    }
Step 5. Run the migration
PM> update-database
Now go to SSMS , you will find a new history table (_Products) has been created which holds all the data of your Product table and the Product table has been successfully deleted.
How to recover from the mistakes , maturely
As part of changing our model and creating migrations, sometimes we may make mistakes and after running the migration , we end up with an undesired database schema , Remember that migration is just like a commit to your source repository , if you did a mistake you couldn't delete it rather you correct your mistake and recommit the changes, similarly to recover from mistakes in code-first workflow just change your model and create another migration and run that migration.