The obvious first step to analyze EDMX is to generate one , for this we need to have a database which we would like to import as our Entity Data Model. So, Open SQL Server Management Studio and Run below script, it will create a database with the name OrganizationDb and Two tables Employee and Department.
   Create database OrganizationDb
   go
   use OrganizationDb
   go
  CREATE TABLE [dbo].[Department] (
    [Id]   INT          IDENTITY (1, 1) NOT NULL,
    [Name] VARCHAR (50) NULL,
    CONSTRAINT [PK_Department] PRIMARY KEY CLUSTERED ([Id] ASC)
  );

  CREATE TABLE [dbo].[Employee] (
    [Id]           INT          IDENTITY (1, 1) NOT NULL,
    [Name]         VARCHAR (50) NULL,
    [Salary]       INT          NULL,
    [DepartmentId] INT          NULL,
    CONSTRAINT [PK_Employee] PRIMARY KEY CLUSTERED ([Id] ASC),
    CONSTRAINT [FK_Employee_Department] FOREIGN KEY ([DepartmentId]) REFERENCES [dbo].[Department] ([Id])
  );
A quick tour of EDMX
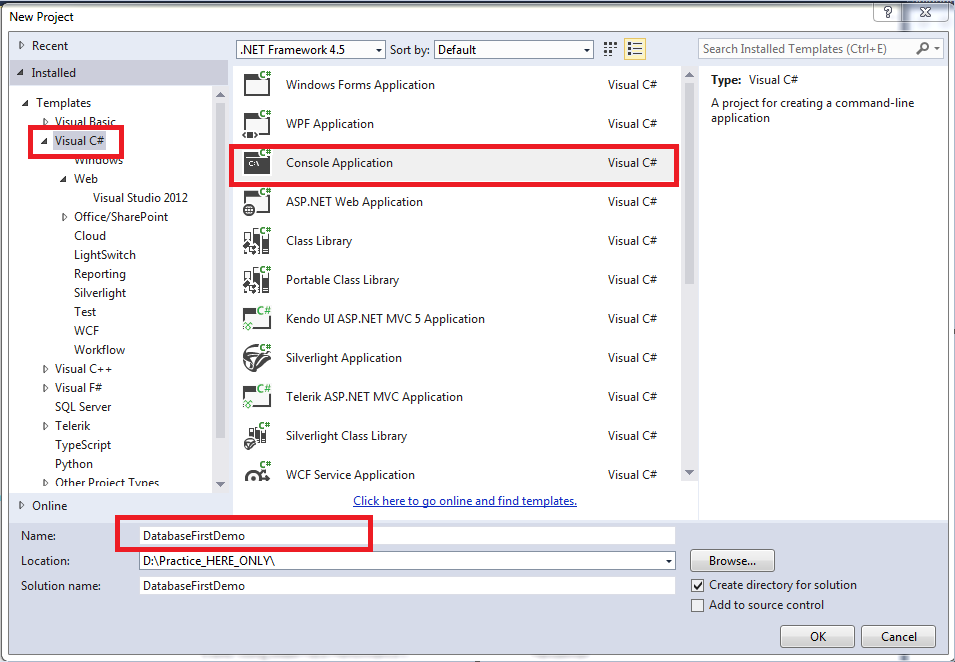
Step 1 So, our database is ready, now it's time to bring it into our Entity Data Model, so let's create a new console application and import our database into a new entity data model. Go to visual studio and create a new project , Name it as DatabaseFirstDemo
The primary focus here is to learn database-first workflow, so for now, I am going to stick to a console app because we don't want to get distracted by the complications of web or desktop app, so to keep things simple and to focus on EF, create a console application.
• Open visual studio.
• Go to Files ---->New---->Project
• Under New Project window select console application.
• Give the project a name (DatabaseFirstDemo)
• Click Ok
Step 2.Install Entity Framework.
With the new project the first step is to Install EF. To do that , we use package manager console.
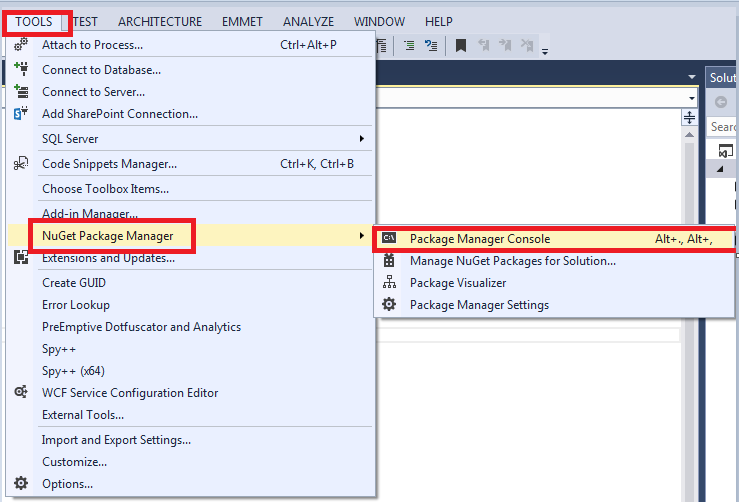
• Go to Tools.
• Select Nuget Package Manger and Then select Package Manager Console and hit enter.
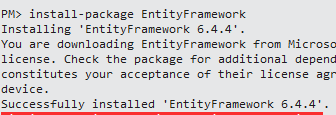
• Install Entity Framework using the install-package command.
Install-Package EntityFramework -Version 6.2.0
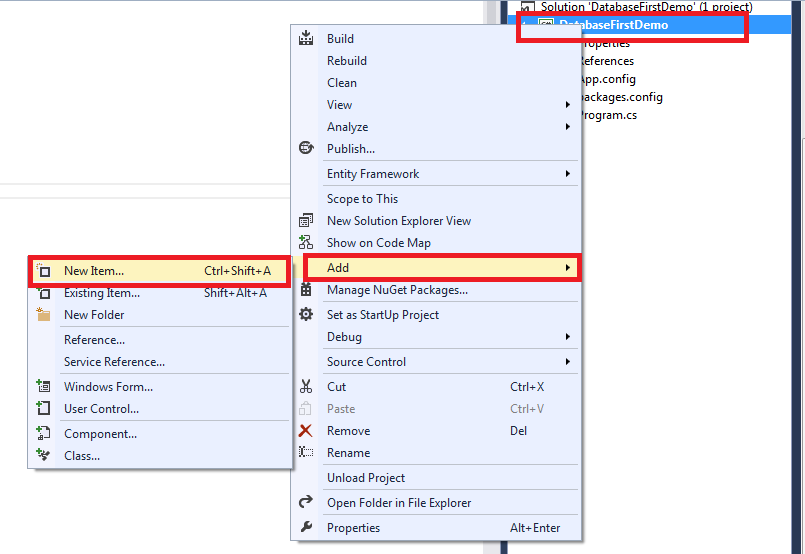
Step 3. Add Ado.Net Entity Data Model.
• Right Click the project.
• Add ----> Add New Item.
• Under Add new Item window select Data tab and under that select Ado.Net Entity Data Model and click Add.
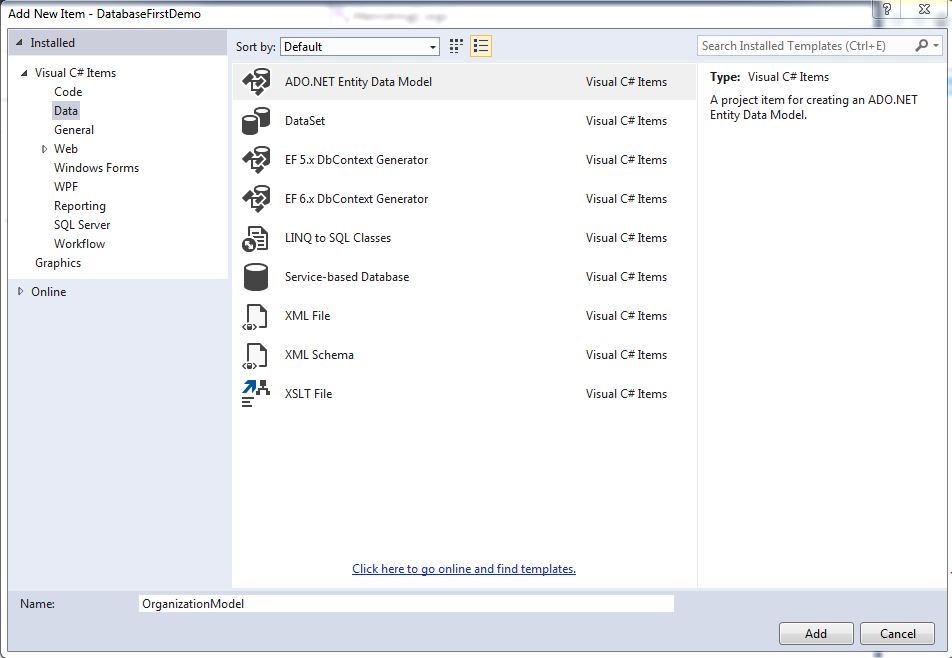
This is going to be our conceptual Model that represents the mapping between our database tables and domain classes. I have given it a meaningful name as OrganizationModel.
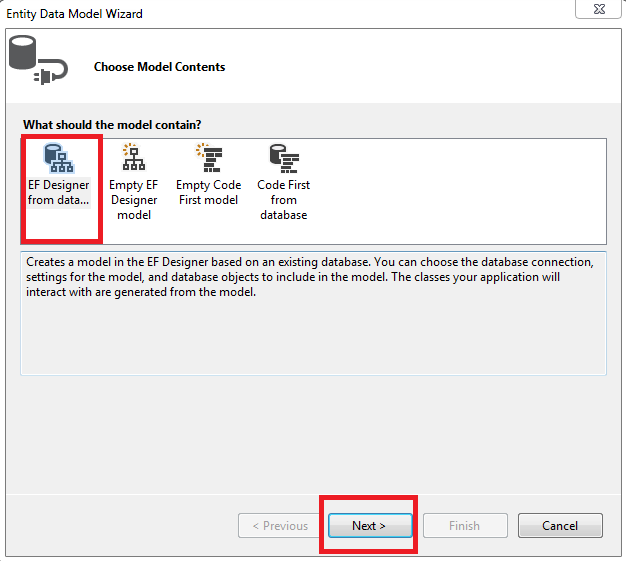
• Under the Entity Data Model wizard, select EF Designer From database , cause we already have a database and click next.
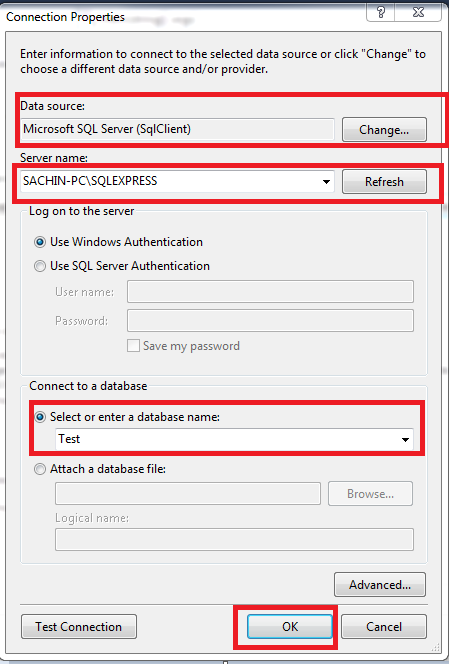
• In the next window select or specify the connection to your database.
1. Specify Server Name
2. Choose Database.
3. Test the connection and
4. Click Ok.
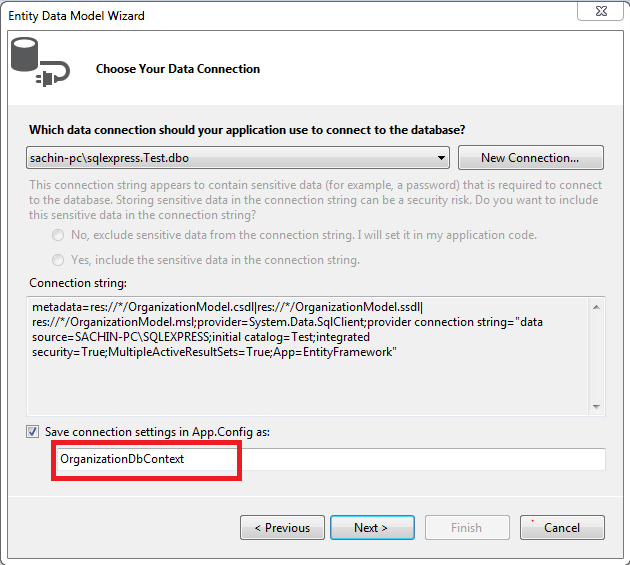
• Change the connection name to OrganizationDbContext and click on Next.
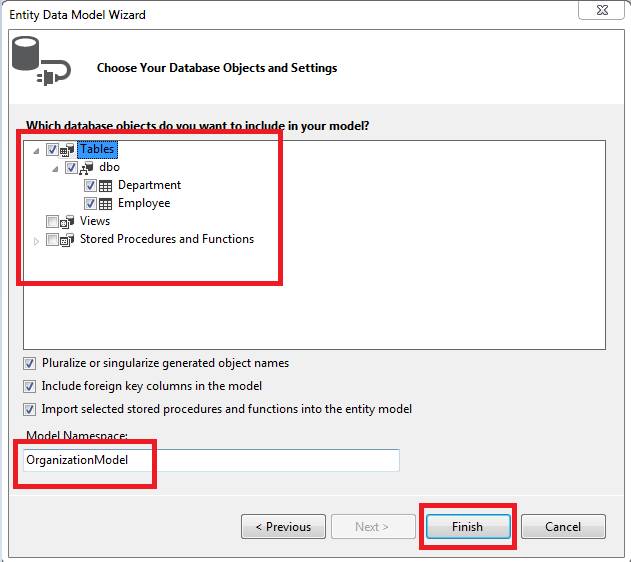
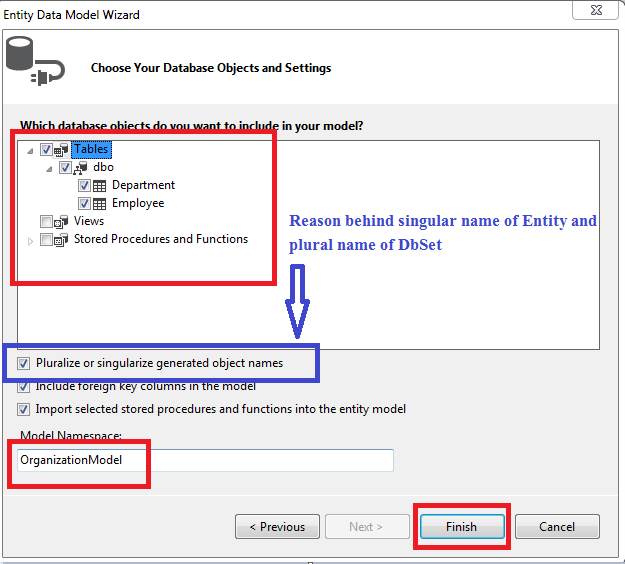
• In the next window select your table and give the model namespace a meaningful name as OrganizationModel and click finish.
Notice :- At this point EF looks at our database and displays the tables, views , stored procedure and Functions , currently we only had tables so we just ticked the table and left the rest as is.
At this point , you will get a security warning like "Running this template can harm your computer" , don't worry about it and just click next. It gives us the warning because visual studio tries to run a template to generate the code.
How EF generates EDMX
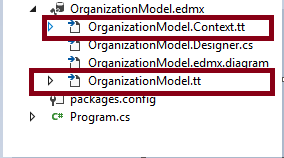
EF generates domain models by running some templates, these templates are present under an EDMX file, the extension of templates is .tt. Let's uncover these templates. As you Notice in the above figure, we have two templates.
1. OrganizationModel.Context.tt and
2. OrganizationModel.tt
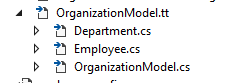
Here the "tt" stands for template , the first template is responsible for generating DbContext and DBSet while the second template is responsible for generating our domain Entities. This is the reason when you expand the first template that is your context.tt you will find your DbContext class, similarly on expanding Model.tt you will find all your domain Entities.


Some Features of EDMX designer
• Zoom in /Zoom out Entities (Ctrl+mouse wheel) : we can zoom in or zoom out entities by holding the ctrl key while scrolling the mouse wheel.
• Move : we can place entities anywhere in the designer by simply dragging them inside the designer area.
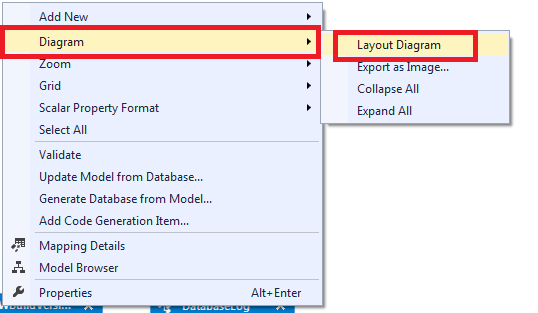
• Layout diagram : if you have large amount of entities then it looks very messy in designer and it becomes very tough to visually analyze the relations among the tables , in this case we can tell visual studio to layout the diagram in the best possible way. To do so, Right click on an empty area in the designer and go to diagram and then select Layout diagram option.
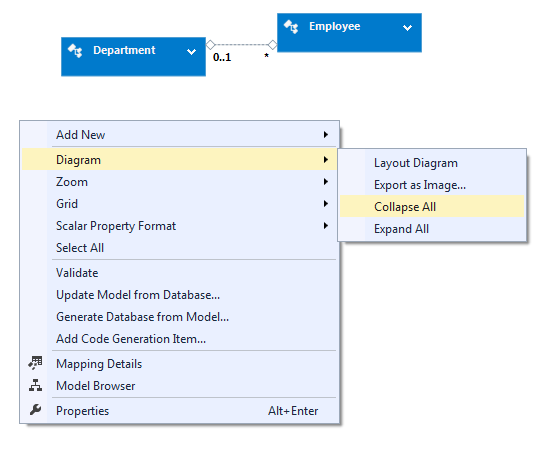
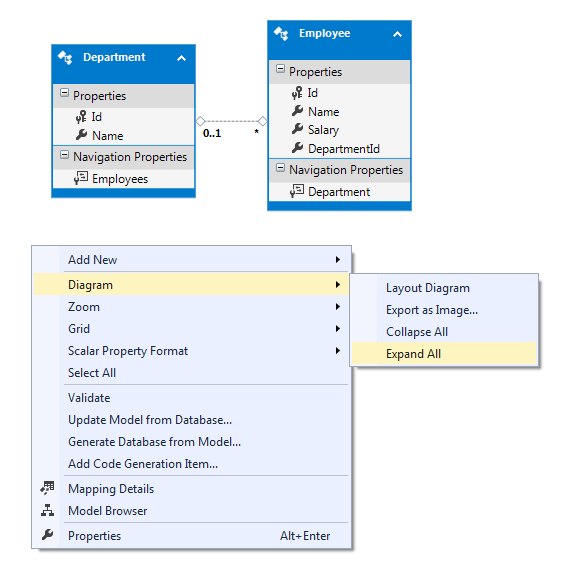
• Expand and Collapse : if you don't want to see the properties of Entities and just want to see the relations among tables then you can use collapse feature of EDMX designer and to undo this setting or to bring back the old settings you can use Expand feature of EDMX designer. To do so , right Click on an empty area in the designer , go to Diagram and select collapse All or Expand All option.
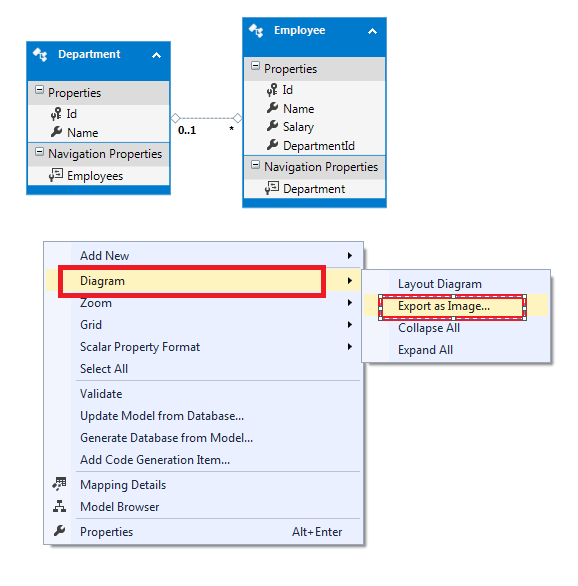
• Export as Image : sometimes you may need to export the Entity Data Model's Diagram as an Image , To do so , you can use the export as Image feature of EDMX designer . Right Click on an empty area in the designer and go to Diagram and select Export as Image option.
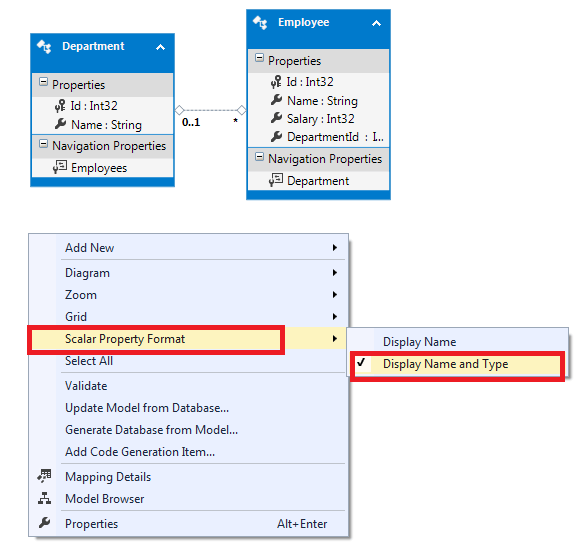
• Scalar property Format : Sometimes you may want to check the data type of the properties of an Entity , by default the Entities only includes the property Name and not their data type because Scalar property Format is set to Display Name only , to change this setting you can set the display property format to Display Name and Type. To achieve this , Right Click on an empty Area in the designer and Go to Scalar property Format and select Display Name and Type option.
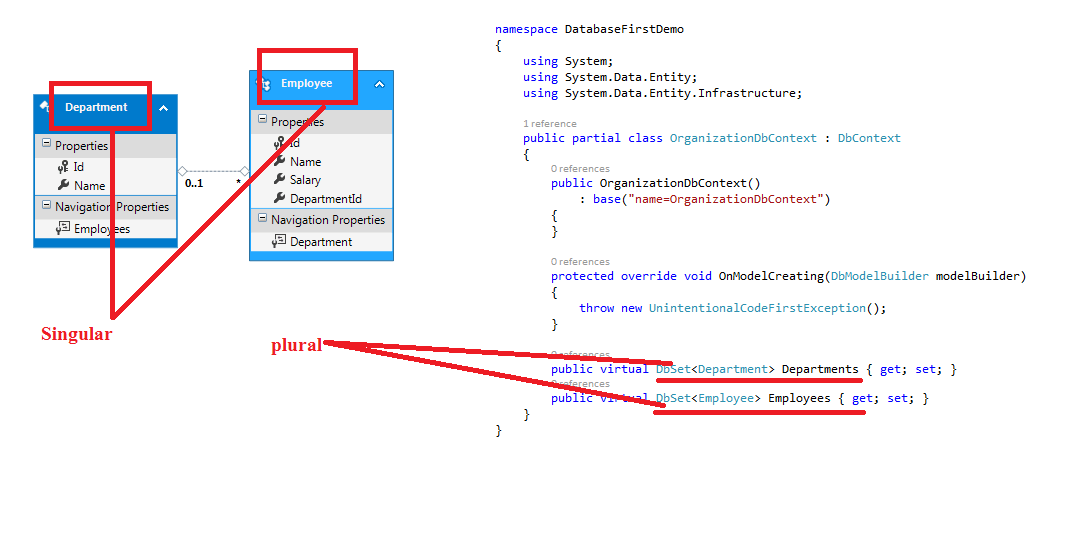
How does EF Name the Entities and DbSet
As you can see in all the above diagrams , Our Entities have singular names Like Employee and Department , but when you will open the context class file , you will find that DbSet have plural Names , This is because , while generating the Entities , we have checked one checkbox , which states that singularize or Pluralize the database objects.
Now , if you want ,you can double click over the Entity Name, in the designer and change it then and there or you can right click while selecting the Entity in the designer and change the Name from its property , after modifying the Entity in the designer when you save it or press ctrl+S , EF regenerates the Entities and DbSet , so here you need to be very careful , because if your code would have any reference to the old Entities then it may break.
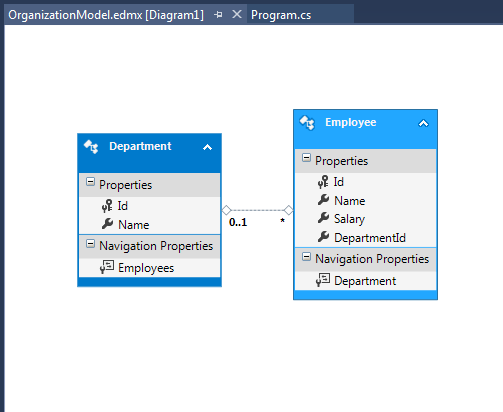
Navigation properties
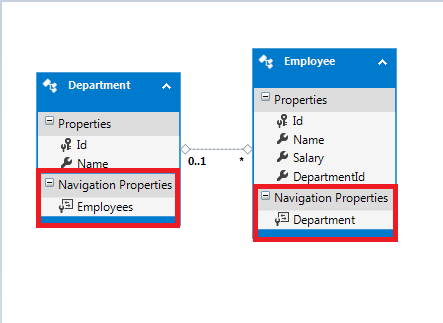
As you can see in the below figure , Inside each Entities we have two sections
• Properties and
• Navigation Properties.
Navigation properties are the property that helps you to navigate from one Entity to another so we can easily navigate from an Employee to his Department or Department to all its Employee. We will discuss Navigation property in detail in later articles.
Uncovering EDMX to understand How does EF work behind the scene
If you have ever worked with WPF or Xamrine then you would know that behind every UI element there is a XML code , All the UI elements are created with XML , we call it XAML programming. Microsoft applies the same concept everywhere , The EDMX designer that you see is actually a visual representation XML , Let's check out the real XML which is responsible to generate our Entities in the designer.
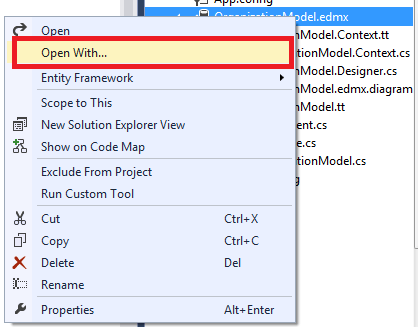
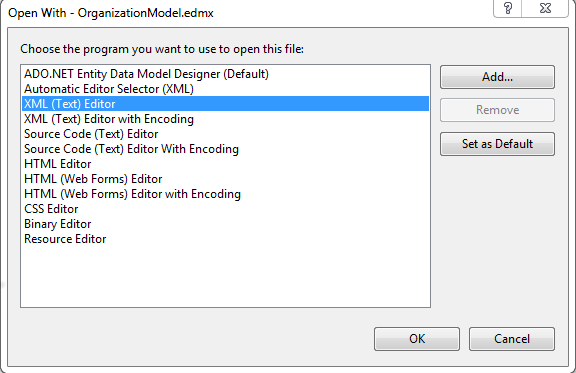
Go to solution explorer ,Right click on the Edmx file and open with XML text Editor.
Note : please close the designer before opening the EDMX with XML editor , because you can't open the different representation of same thing in two places at the same time. The XML content is shown in the below figure .
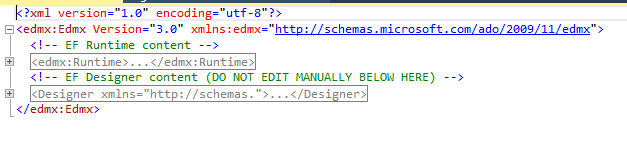
As you can see , it has two main sections
1. EF Runtime content and
2. EF designer content
The designer section includes the data about the visual representation of the EDMX , like if we zoom in the diagram or move entities around , anything we do visually in the designer will be represented here.
The runtime section includes everything about our Entity Data Model , so it is where we are interested in, let's expand this and check what does it contain?
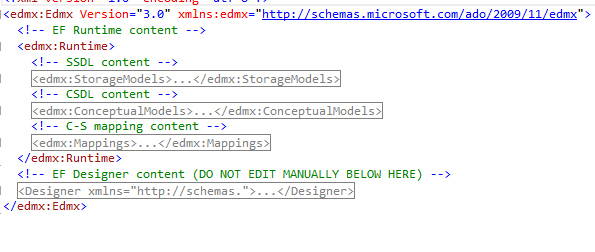
On expanding the Runtime section , we find that it has 3 subsections
1. Storage Models (SSDL)
2. Conceptual Models (CSDL)
3. Mappings (C-S)
Let's take a deeper look at each of these sections

Under storage model, there is data about our database , tables and columns , In short storage model knows everything about our database. Notice the data type of columns are actual SQL server data Type like varchar , int etc and not C# data type like string or int32. So , storage model is a complete replica of our database.
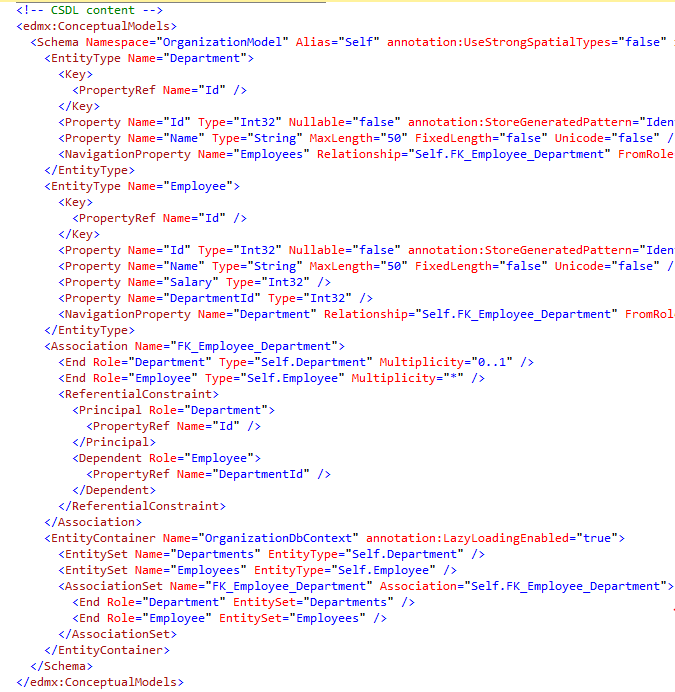
Under conceptual model , there is everything about our Entities , Like Name of the entity , their properties and type of the properties , notice here the data type of properties is actual C# data type and not SQL Server data type , so , we can say, storage model represents our Entities completely.
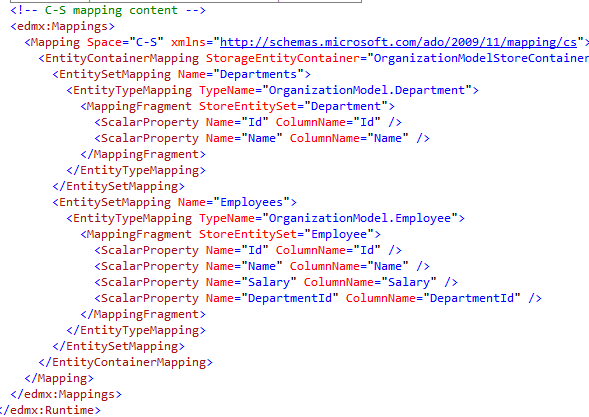
Under Mappings section , the relation between storage model and conceptual model is defined , for example the Name column of Employee in storage model maps to the Name property of Employee Entity.
The above three section is the core of any ORM , they define how to map a object oriented Model to a Relational Model.
Edit the storage Model , the Conceptual Model or Mappings
whatever we see in the EDMX designer is only our Entities. We don't see the conceptual model , storage model or Mappings between the two , they all are hidden , but it is possible to visually analyze them and modify them as per our requirement, if we need.
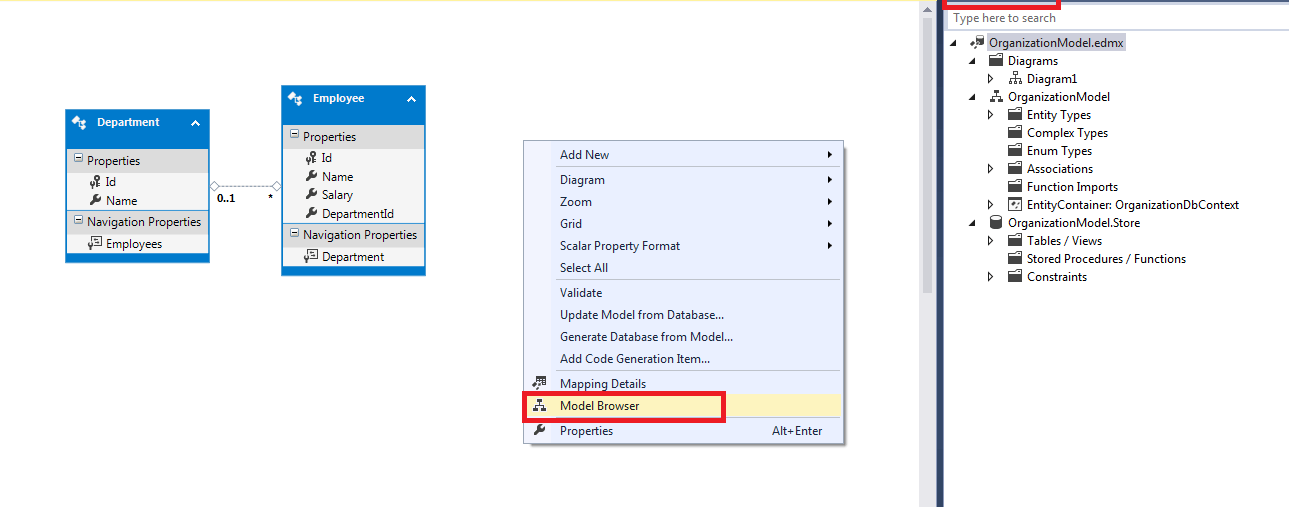
• To Edit the Storage Model objects or Conceptual Model objects we use Model Browser.
To open the model browser, Right-click on an empty area in the EDMX designer and Select the Model Browser.
As you can see in below figure the model browser has two section.
1. OrganizationModel : it displays the conceptual model in a tree structure.
2. OrganizationModel.store : it displays the storage model in a tree structure.
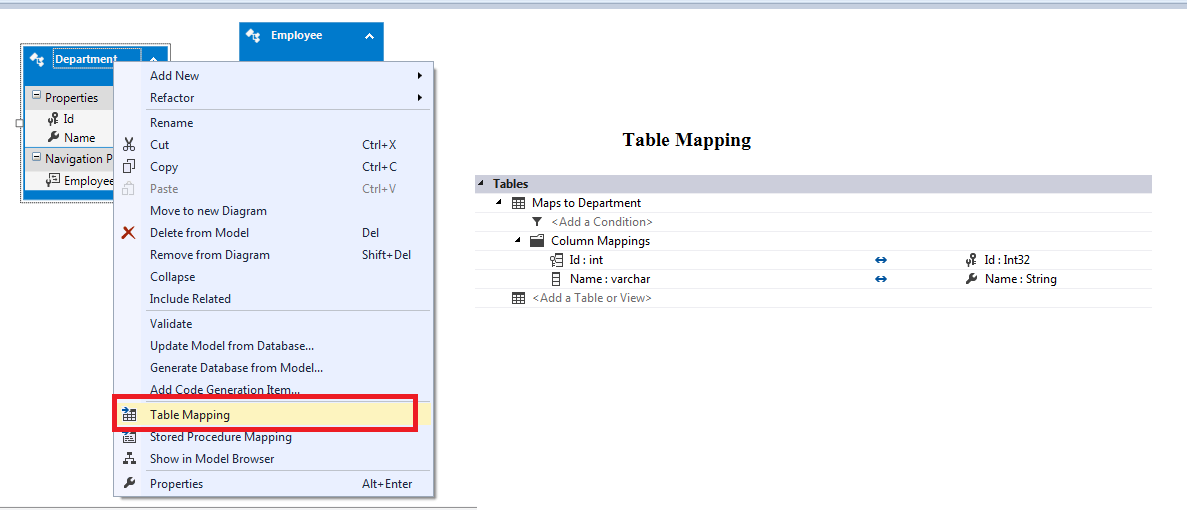
• To Edit the mappings we use Table Mapping. To open table mappings , select the Entity for whom you want to see the mappings and select table mappings.
Summary: EDMX is an XML that knows everything about our database and Entities , Every information about the database is present under storage model while every information about Entities are present under conceptual model and the relation between the two are defined in Mappings section , this three are the core of EF.
Table mappings is used to edit the mappings while model browser is used to add edit or delete anything from storage or conceptual model.