MVC stands for Model, View and Controller. Nothing got cleared, right? You may ask what the heck Model, View, and Controller actually do?
Suppose you are a civil engineer or an architect who has the responsibility to construct a house. What steps will you follow?
I think you will follow the following steps:
- You will bring raw materials like wood, bricks, cement, etc., from any source, call it source of material.
- You will store these materials in a temporary place near the place of interest where the actual house is going to be built. You will also keep material in some logical manner for easy use.
- Now, you will start construction in the real physical form into the land of interest (place for construction) and design a beautiful home.
Great! Now, let's change the terminology:-
- Home-->Web Application.
- Architect-->Web Developer
- Source of Material -->Database (source of data for web application)
- Temporary Place -->Model (for business entity and business logic of webapp)
- Place for Construction-->Controller (for your logic)
- Beautiful Home Design-->View (html)
Now, change the story a little bit.
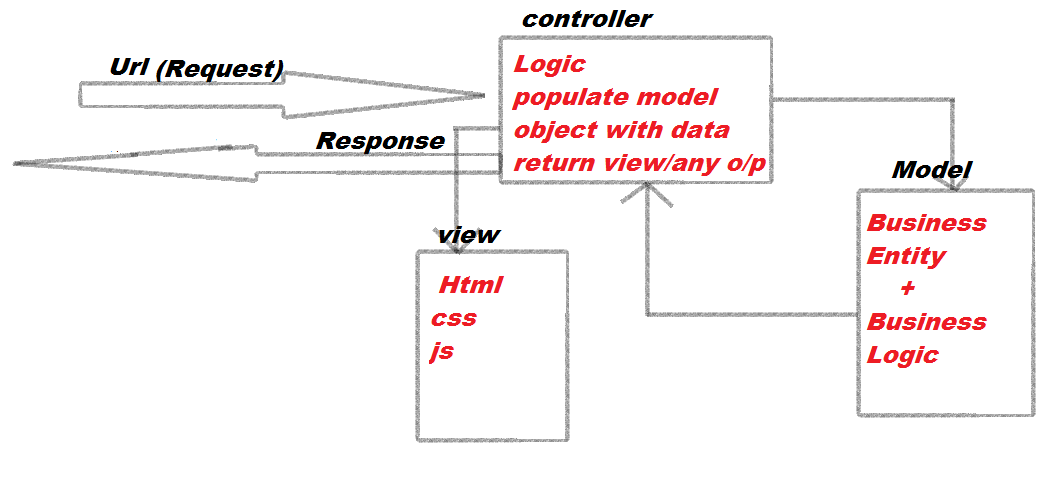
You will keep your business entities in the model, write some business logic there, and start coding for the web application in the controller. Whenever you need some entity, you will create the object of the model, i.e., entity, and populate data from the database. Finally, you will design a view and will send this model object to the view.
The request from the browser always goes to the controller first, where your logic will be processed, the model object will populate with data, and finally, the view will be rendered as a response.
Now, put some effort and think about what we did here.
We actually created a pattern to separate different logical parts for better maintenance and processing. This is what we call MVC, an architectural pattern for the separation of concerns.
Let's understand it by example:
Open Visual Studio and follow the steps below:
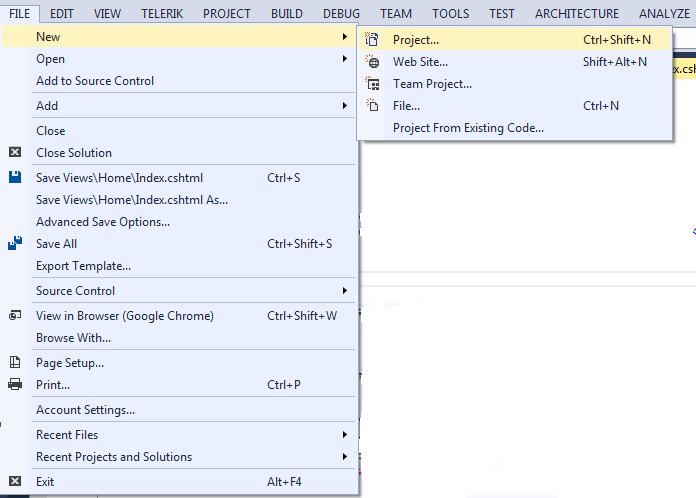
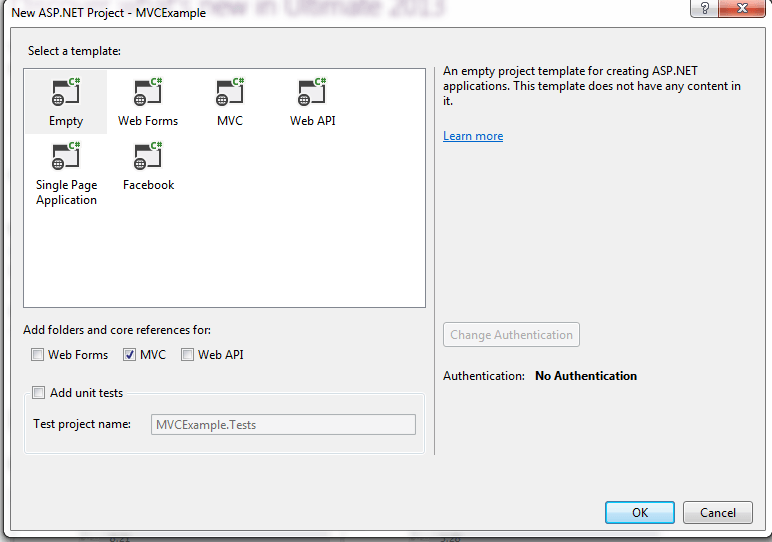
- Step 1) Go to File-->New--> Project
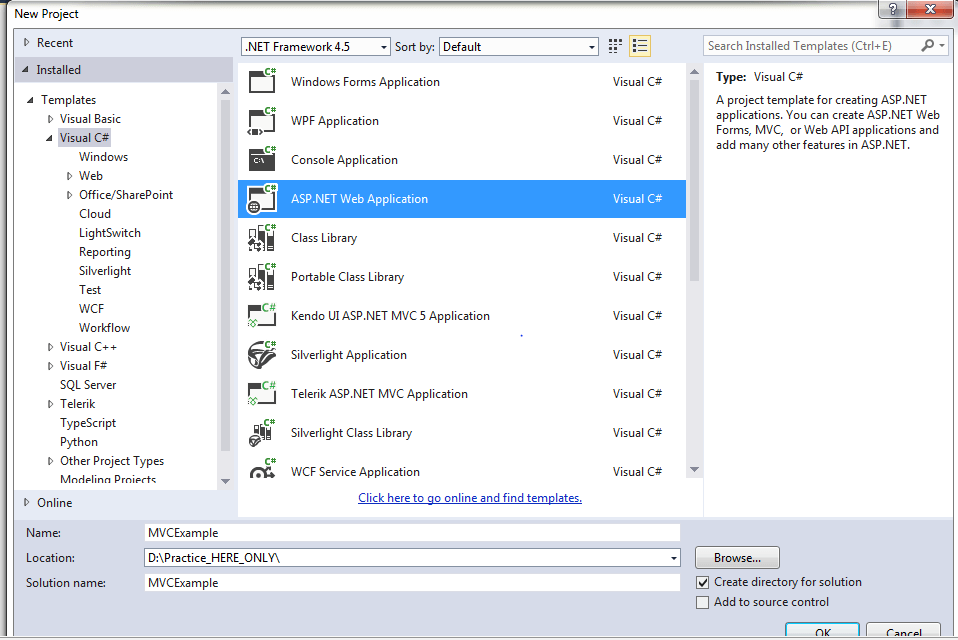
- Step 2) Go to Installed Templates --> Visual C# --> Asp.Net Web Application. Here, set the name and location for your application.
- Step 3) Select Empty Template and check the MVC checkbox if you want an empty MVC template, or directly select the MVC template if you need some code examples.
Below are the figures for the above steps:
On the right side, you can see the MVC directory structure with Model, View, and MVC folders. This is called the Solution Explorer, as shown below:
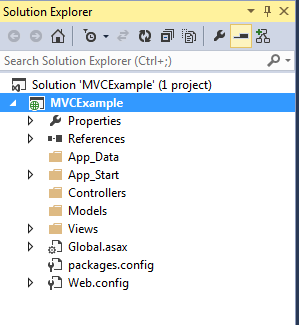
Note:If you are unable to see it, go to View in the menu bar and select Solution Explorer.
Now, suppose we have to create a web application to show the details of students of any school.
For now, we will not use the database to retrieve student information and will hard-code the information, as the focus is only on understanding the MVC Request-Response flow.
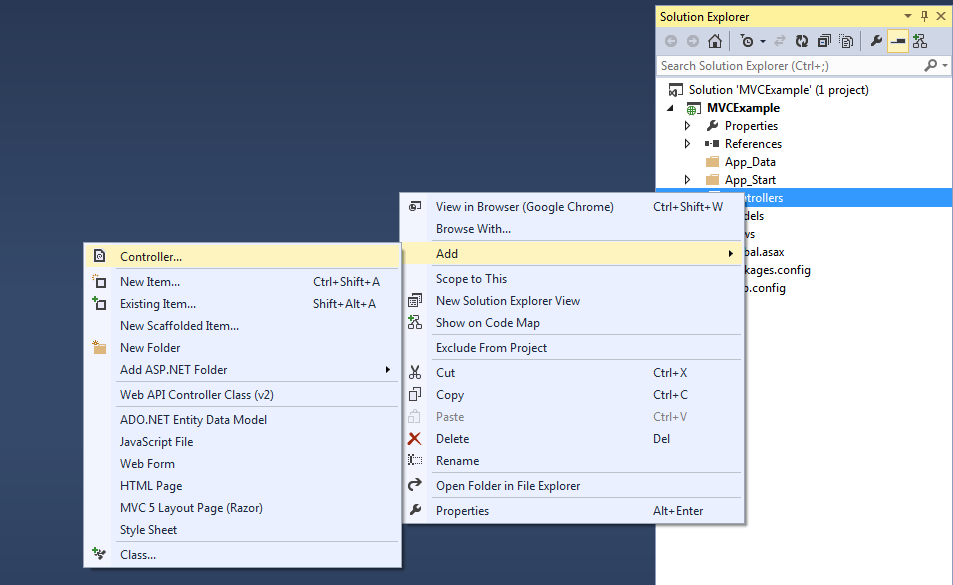
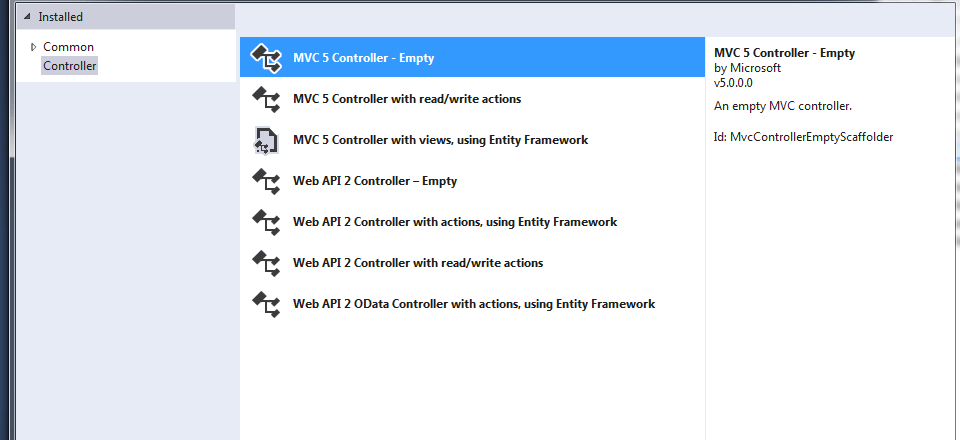
- Step 1) Create a controller (the real land for construction) and name it StudentController. Note:Each controller must suffix with the Controller name, so just change the prefix and keep the word Controller as it is.
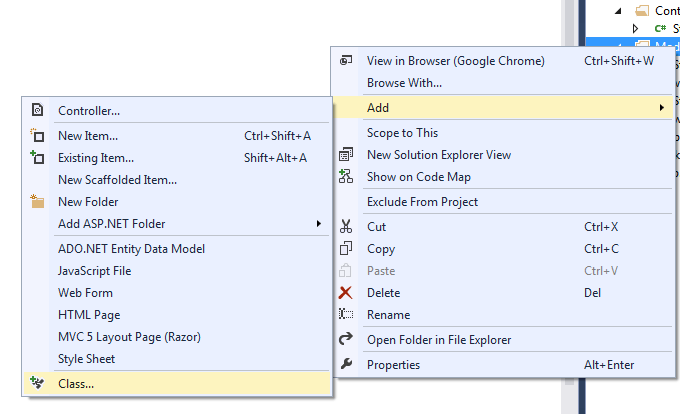
- Step 2) Go to the Model folder and create a class. Name it as Student with some property. Here, we are actually creating a business entity.
[Controller folder-->Right Click-->New-->Controller]
public class Student
{
public int Id { get; set; }
public string Name { get; set; }
}
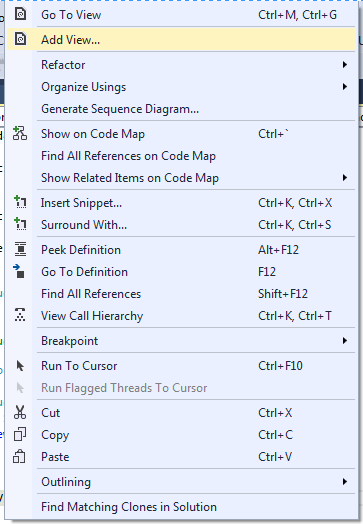
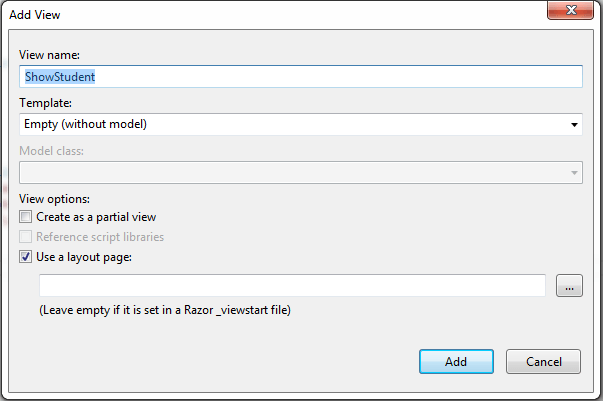
public ActionResult ShowStudent()
{
return View();
}
Note:Here, the return type is ActionResult, which is capable of returning the View. You will learn more about ActionResult in the ActionResult Section.
public class StudentController : Controller
{
//
// GET: /Student/
public ActionResult ShowStudent()
{
List<student>
studentList = new List<student>
() {
new Student(){Id=1,Name="Michael"},
new Student(){Id=2,Name="John"},
new Student(){Id=3,Name="Lucy"},
};
return View(studentList);
}
}
Note: Don't forget to import Model namespace.
using MVCExample.Models;
@using MVCExample.Models
@model IEnumerable<Student>
@{
ViewBag.Title = "ShowStudent";
}
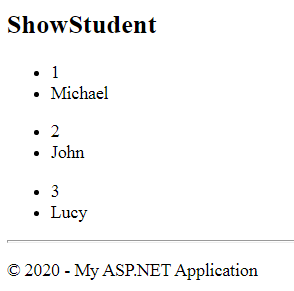
<h2>ShowStudent</h2>
@foreach (var item in Model)
{
<ul>
<li>@item.Id</li>
<li>@item.Name</li>
</ul>
}
routes.MapRoute(
name: "Student",
url: "{controller}/{action}/{id}",
defaults: new { controller = "Student", action = "ShowStudent", id =
UrlParameter.Optional }
);
Note: You will learn everything about routing in the next article.
Now, run the application. You will get the following result: