This article purely aims to the beginners, who have no idea about Kendo UI Components and Widgets.
Here we will use some of the Kendo UI components to design a User Registration Form, with the sole purpose of making you aware with Kendo UI components and how you can use them in your asp.net mvc project.
After reading this article it is your duty to create such a form by yourself to strengthen your confidence.
Note:- Please read the previous article before reading this.
Now Let's start thinking,
Daily you come across a lots of websites who asks you to Sign Up or Log In. For example before making friends on facebook ,you actually register yourself in the app.
Usually any Registration Form have these below fields:-
| Fields | Html | Kendo UI |
|---|---|---|
| User Name | ||
| Gender | ||
| DOB | ||
| Password | ||
| Profile Image |
Now Let's create a form in asp.net mvc using above kendo components.
Open visual studio and create a new project as described in previous article. Create a controller and one action method as below
     public ActionResult Register()
        {
            return View();
        }
now add view and paste below code
   <table  class="table table-bordered">
    <thead class="bg-dark text-center text-white">
        <tr>
            <th colspan="2">Registration Form</th>

        </tr>
    </thead>
    <tbody>
        <tr>
            <td>User Name</td>

            <td>@(Html.Kendo().TextBox().Name("txtName"))</td>
        </tr>
        <tr>
            <td>Gender</td>

            <td>
                @(Html.Kendo().RadioButton().Name("rdoMale").Label("Male").HtmlAttributes(new { Name = "rdoGender" }))
                @(Html.Kendo().RadioButton().Name("rdoFemale").Label("Female").HtmlAttributes(new { Name = "rdoGender" }))
            </td>
        </tr>
        <tr>
            <td>DOB</td>

            <td>@(Html.Kendo().DatePicker().Name("dateDOB"))</td>
        </tr>
        <tr>
            <td>Password</td>

            <td>@(Html.Kendo().TextBox().Name("txttPassword").HtmlAttributes(new { type = "password" }))</td>
        </tr>
        <tr>
            <td>Profile Image</td>

            <td>@(Html.Kendo().Upload().Name("uploadImage"))</td>
        </tr>
        <tr>
            <td colspan="2">
                @(Html.Kendo().Button().Name("btnSubmit").HtmlAttributes(new { type = "button", @class = "ml-auto k-button k-primary", style = "height:35px;width:70px;" }).Content("Save").Events(e => e.Click("btnSubmit_Click")))
            </td>
        </tr>
    </tbody>
</table>
Note:- Don't forget to import the Kendo.Mvc.UI namespace in the view.
like this:-
@using Kendo.Mvc.UI;
Run the application and you will get the below output
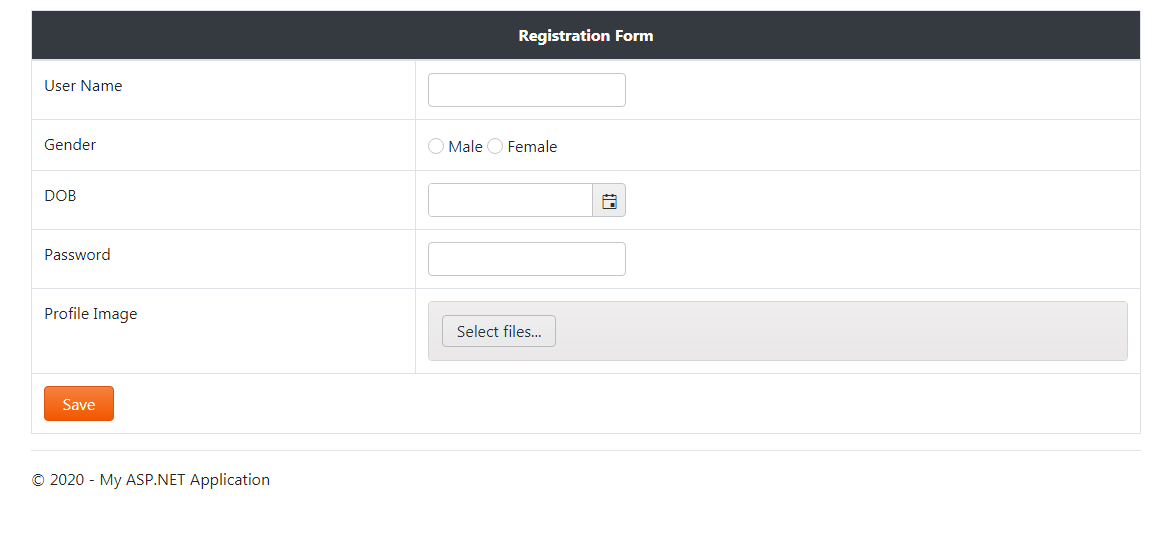
so ,you have successfully used Kendo UI components to design a user registration form and rendered it in your browser. But what you have learnt??? I think nothing. This is just a copy paste work and anyone can do it.
so let's really learn and understand what we did:-
1.To use any Kendo UI component ,we use html helpers starting with @(Html.Kendo())
2.As we put a dot(.) the intellisence start showing us different options of that control ,but how are we able to use them ?The answer is Kendo UI has its own fluent api .
In plain English fluent means without any break like a chain. So due to fluent api we can chain different options.
3.For Html attributes like Type,Name,Class etc we use HtmlAttributes() method which accepts object of html attribues where we pass name-value pair of any attribute.